
Now that you have made a fresh batch or purchased your koji rice, the next step is what to do with it. Many people use koji-kin rice to make saké, amasaké, or miso. However, what other ways are there to turn koji rice into something extraordinary?
Here are a few recipes to get you started…
~ Basic Amasaké Ferment ~
Used in Japan as a sweetener, beverage, or a simple alcoholic drink. Amasake is one of the best known cultured and fermented items from Japan. There are several recipes for amasake that have been used for hundreds of years. By a popular recipe, kōji is added to cooled whole grain rice causing enzymes to break down the carbohydrates into simpler unrefined sugars. As the mixture incubates, sweetness develops naturally.
By another popular recipe, sake kasu is simply mixed with water, but usually sugar is added. In this recipe, amasake becomes low-alcohol beverage if given time.
Amasake can be used as a dessert, snack, natural sweetening agent, baby food, added in salad dressing or smoothies. The traditional drink (prepared by combining amasake and water, heated to a simmer, and often topped with a pinch of finely grated ginger) was popular with street vendors, and it is still served at inns, tea houses, and at festivals. Many Shinto shrines in Japan provide
or sell it during the New Year!

What is needed…
3- cups cooked brown rice
1- cup light koji rice
If koji rice is needed…order here
Yield: 4 cups of fermented rice to use as a sweetener or 3 quarts Amasaké drink
Incubation Temperature: 120-140 F (50-60C)
Start by cooking the brown rice and allowing it to cool to at least 140 F (60C). Once cooled, stir in the koji rice and mix well. Place mixture into a glass or stainless steel container that will allow an inch of “headroom” to allow for expansion during the fermentation process. Cover container and incubate, stirring every couple of hours to prevent heat build up. The finished product can take as little as 6 hours with quality, fresh (not dried) koji-kin at optimum temperatures, after 6 hours start tasting the ferment to see if the cycle is complete.
 When finished the ferment should thicken like porridge with a mild sweet taste. The sweetness will increase up to a point after which it will change and start to become sour. Once the taste is to your liking, place into a saucepan and bring to a boil. Reduce the heat and simmer for 3 to 5 min., stirring frequently. Boiling will stop the fermentation process keeping the amasaké sweet. For a smother amasaké consistency purée the mixture in a blender until smooth. Refrigerate any ferment not used right away. If not, the amasaké will become very sour.
Ways to Use Amasake Rice…
 Amasaké Sweetener: Use ¼-cup ferment for each tbsp of sweetener called for in your favorite recipes and reducing the cooking liquid by 3 Tbsp. Baked goods will be rich and moist with a more subtle sweetness.
 Amasaké Drink: For HOT amasaké, heat one part ferment and two parts very hot water. Add a dash of shoyu and a grating of fresh ginger root. Serve blended mix in heated mugs. For a cold drink, blend 1 part amasaké ferment and 2 part fruit, fruit juices, soy milk water and/or flavoring of your choice.
 Doburoku: For simple “grog”, leave the amasaké ferment in the incubator for several days, stirring and tasting occasionally, until it develops a heady, alcoholic aroma. Blend as above, traditionally served in Japan as a thick and creamy drink or dilute to taste.
~ Mellow Pickled Cabbage ~
In Japan, pickled vegetables come with many meals, as a condiment or side dish. In Japan it is called ‘Kyabetsu no asazuke’. Unlike normal pickles this recipe is a fermented pickled delight. Like German style sauerkraut, pickled veggies are uncomplicated to make into a fermented snack or condiment!

What is needed…
1 – pound organic cabbage of your choice or a mix of green and reds. Use American style or Napa/Chinese styles
2 – Tbsp non-iodized salt (Kosher or sea salt)
¼-cup koji rice If koji malted rice is needed…order here
¼-cup warm water
½ tsp honey or other sweetener
A Japanese tsukemono pickle press
Start by removing the center core and shred the cabbage coarsely. Mix well with the salt and pack into a glass bowl. Put a small enough plate to fit inside the bowl and weight it down with water filled glass jar or non-metal container.
Refrigerate for 3 days.
After 3 days, draw off the liquid from the cabbage but do not rinse.
TIP: Save the liquid brine for other uses. Dissolve the honey/sweetener in the warm water and add the koji rice. Set aside until the koji has dissolved the liquid and softened.
Next, mix the soaked koji and cabbage, mixing well. Pack contents into a straight-sided container, Add a plate and weight to keep everything under the liquid. Submerging the cabbage keeps the mixture from contamination with unwanted bacteria. Allow 4 to 5 days for the flavor to develop then refrigerate. Use within a week or two.
For those who do not wish to mess with jar and weights, a Japanese pickle fermenter is a great investment. Visit our shop to purchase the Japanese tsukemono pickle press. See photos for recommended styles.


~ Koji Pickled Sea & Root Vegetable Condiment ~
Here is another great recipe for using your fresh made koji-kin rice. It is a mix of seaweed and root vegetables with a lot of
umami flavor and health.

What is needed…
– ¼ cup of fresh light koji-kin rice Order koji malted rice here
– ½ oz dry kombu, wakamé, or sea palm. Should yield about ½ cup after soaking
– 1 to 1 ½ cups daikon, baby burdock root, or carrot. We enjoy a combination of all three. Try using any type of herbal roots, too.
– ¼ cup naturally fermented soy sauce, shoyu, or tamari
– ¼ cup mild vinegar, plain or flavored
– ¼ cup mirin or saké. Mirin imparts a sweet component to the mix and saké a dry alternative, extremely recommended!

Start by soaking the Kombu and/or other sea vegetable for 10 to 20 min. in just enough water to cover, soak until softened. Reserve ¼ cup of the soaking water and cut the sea vegetables into slivers or short ribbons. Next, scrub the root vegetables to remove any soil and cut them into thin slivers. Place the root vegetables, sea vegetables, and reserved soaking liquid into a saucepan and bring to a low boil. Add soy sauce and vinegar and return to a low boil. Cover and remove from heat. This step kills of any unwanted bacteria or wild yeast.
When the mixture has cooled to 110F (45C) (warm, but not too hot to touch) transfer to a glass bowl and stir in the koji-kin, mirin, and saké. Let the mixture mature for 4 hours at a cool to moderate room temperature, covered, stirring occasionally from time to time.
The pickled vegetables are ready to consume now or pack into quart mason jars and refrigerate the unused portion, which will continue to mellow and enhance the flavors even more over time. But first enjoy a bowl with your favorite grains!
To purchase koji spores or fresh made koji-kin please visit our web store:
Buy Japanese Koji Spores
Buy Malted Koji Rice Here

 Rinsing is very important to remove the starch from the rice kernels. If not removed, the finished steamed rice can stick together and makes complete inoculation difficult.


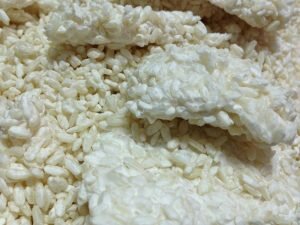
 NOTE: Over cooking of the rice will not produce the desired finished product, as the spores cannot encapsulate each grain of rice. Most important is that the rice grains are whole and not broken by over cooking/steaming. The trick is to have enough moisture within the rice grains for the koji mold to form, yet not overcooked to the point that the rice will start decomposing.


