Tag Archives: pickle

How to Make a Japanese Nuka Zuke Pickle Bed

Looking for a new way to ferment vegetables?
Something quick and easy to make fermented pickles that are a great condiment to any meal.  A Nuka bed offers a way to get lactobacillus bacteria and wild yeast, without having to vent
or clean up exploding glass jars!
It makes a great RAW, fermented/cultured, and vegan condiment.

NUKA BED

What is a Nuka ‘Bed’?

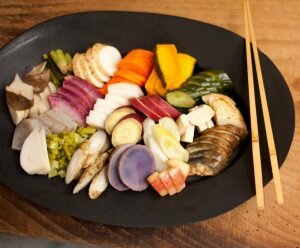
Nukazuke (糠漬け) are a type of Japanese pickle, made by fermenting vegetables in rice bran (nuka). Almost any edible vegetable may be pickled through this technique, though traditional varieties will include eggplant, Japanese radish (daikon), cabbage, and cucumber. The taste of nuka pickles can vary from pleasantly tangy to very sour, salty and pungent. These pickles also retain their crispness which adds to their popularity.

Fish nukazuke is also common in the northern part of Japan.
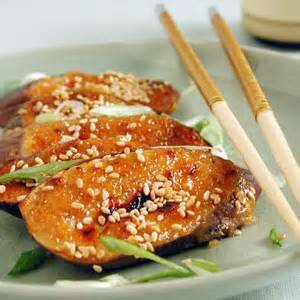
Sardines, mackerel, and Japanese horse mackerel are frequently used. Some people pickle meat in nuka-bed, too.
If pickling meats, use a separate nuka bed and not the bed for vegetables.

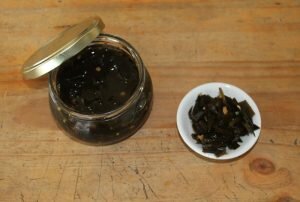
The nuka-bed is traditionally kept in a wooden crock but ceramic crocks or even plastic buckets are also common. Many Japanese households have their own nukazuke crocks which are faithfully stirred by hand every day. Due to varying methods and recipes, flavors vary considerably, not only from region to region, but also from household to household.

Pickles (tsukemono) are an important staple of Japanese cuisine, and nukazuke are one of the most popular kinds. They are often eaten at the end of a meal and are said to aid in digestion. The lactobacillus in nukazuke pickles may be a beneficial supplement to the intestinal flora.  They are also high in vitamin B1.

How to Make Your Own Nukazuke Pickle Bed
RAW – Vegan – Gluten Free

nuka zuke
Japanese Pickles Ready to Eat

Needed Ingredients…

–  Rice Bran, no-GMO and/or organic – 20 oz
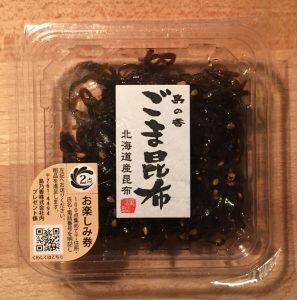
–  Kombu Seaweed – one leaf, cut into very small pieces
–  Sea Salt – 1/4 cup or to taste
–  Korean Chili Flakes – 1/8th to 1/4 tsp
–  Dried Citrus Peel – 2 tbsp
–  Dried Bonito Flakes – 1/8 to 1/4 cup – Optional
–  Fresh lemon or lime juice – enough to cover top of nuka bed
–  Condiments or veggies of your choice – Keep whole
–  Also, for a new starter bed add some fresh fruit like apples
– A fermenting vessel – lead free

Directions…

Note: It needs to be stored under refrigeration after opening to avoid mold.  Storage term: 12 month (This usable time is only a guide. If you stir well NUKA-BED with your hand once every 2-3 days, add extra NUKA rice bran and salt as necessary, it can be used semi-permanently.)

If you are using the nuka kit purchased from us, you will receive two packets.  The larger pack is the rice bran and flavorings.  The smaller packet is the Nuka starter with fresh sliced fruit.

1.  Start by opening the large packet or mixing the above ingredients together and adding enough filtered water (no city tap water please) to make a thick paste.  Add the water in small amounts until the correct thickness is obtained.  The bed should be like a thick paste.
Over time, the addition of the vegetables will add water to the mixture and more fresh rice bran and salt will be needed.

2.  Now add the small packet that contains the nuka starter and fresh fruits.  If making your own nuka bed, add some slices of fresh cut organic or wild apples (this adds wild yeast and wanted bacteria).
Mix in the nuka starter by hand until well blended.  Also, when starting a new nuka bed from scratch,  it will take time for the bacteria and yeast to grow through the bed and become 100% active. The lemon juice will help with retarding mold growth.
Note: It is important to mix the bed by hand to spread wanted bacteria within the bed mixture.

Japanese pickles NUKA-BED

3.  Add the vegetables that you wish to pickle.  Common choices are roots like burdock and carrots, small eggplant, Japanese radish (daikon), cabbage, and cucumber.  We like doing radishes and cucumber!
Rub the vegetables with sea salt then place into the nuka vessel pushing them down to cover with the rice bran mixture.  Sprinkle the top of the bed with the lemon juice and more salt.

4.  Allow the vegetables to sit in the nuka bed for 3 to 5 days. Culturing time may vary depending on the vegetables used and temperature.  The taste will move from tangy to very sour the longer the pickles set in the nuka.  Do not ferment at room temperature during the hot summer months or the bed may become contaminated with molds.

Hand Mixing NUKA-BED
Daily Hand Mixing nuka bed

Mix by hand each day making sure to replace the vegetables under the rice bran.  Salt may be sprinkled over the top to help retard mold growth, too.  Once complete and to your liking remove the nuka pickles, slice, and serve.  Start a new batch or place fermenting vessel in the refrigerator keeping it mixed to prevent mold growth.

Enjoy this method of making great quick pickles without the mess of multiple jars, airlocks, weights, and other unnecessary items.  The taste and flavor of the cultured nuka vegetables is second to none!  If you want a premixed nuka bed, we have them available in traditional or vegan, at our web store – store.organic-cultures.com

Happy Culturing!


Quick and Easy Japanese Condiments


miso eggplant
These condiment sides are a great way to enhance a meal or dish.  Very easy to make and uses only a few ingredients.  The Japanese use many of these condiment sides every day and most contain minerals and micro-nutrients that normal
salt and pepper cannot compare.


Seaweed Furikake (Nori Fumi Furikake)

Nori Fumi
In Japan, Furikake is a popular table seasoning that comes in a variety of flavors.
Nori fumi furikake, meaning seaweed flavored furikake, is a very popular flavor, and for good reason! It’s a classic combination used on plain rice, for a cheap meal.  Just a sprinkle gives the perfect boost of flavor for rice, noodles, soup, or other dishes!

How to use furikake besides adding to white rice?  Try using Japanese furikake with any recipe that calls for shredded nori on top.

Ingredients…

  • 1/4 cup white sesame seeds
  • 1/4 cup black sesame seeds
  • 2 sheets nori seaweed
  • 1 teaspoon sea salt
  • 1 teaspoon sugar

Directions…

– Start by grinding the black and white sesame seeds.  Add the sea salt and sugar, grind until texture is correct.
– Next, toast the nori over an open flame for a few seconds, if not already toasted.

nori seaweed
Cut nori sheet into long thin strips.  Now layer several strips and fold over 2 or 3 times.  Cut the folded nori into very tiny strips.  For better looks, cut the nori into very small pieces vs. grinding/blending them up.

Shichimi Togarashi, Japanese Seven Spice

Shichimi Togarashi
Shichimi Togarashi

With the expanding appreciation of Japanese cuisine here in this country, there is a need to incorporate the seasonings needed to create and enhance them as well.  This seasoning is popular in Japan and used to add both heat and flavor to dishes such as soba noodles, udon, beef tataki, jasmine rice. The heat of this seasoning, unknown in most Japanese cuisine, is just a little.  So there is just a hint.  Hand mixed from orange peel, black, white and toasted sesame seeds, cayenne, ginger, Szechwan pepper and nori.

Ingredients…

1/8 c – Orange/tangerine peel, dried
1/8 c – Black sesame seeds
½ c  – Toasted white sesame seeds(dehulled)
– Toasted nori – 2 sheets
– Japan or Korean chili, to taste
– 1/8 or 1/2 teaspoon – Dried ginger root
– Szechwan pepper, to taste
– Optional, one may add hemp seeds and shiso to the mix

Directions…

Start by grinding the orange peel, black/white sesame seeds, ginger, pepper, and chilies.
Once your happy with the grind and flavor, next is to add the nori sheets

Toast the nori over an open flame for a few seconds, if not already toasted.
Cut nori sheet into long thin strips.  Now layer several strips and fold over 2 or 3 times.  Cut the folded nori into very tiny strips.  For better looks, cut the nori into very small pieces vs. grinding/blending them up.

Yukari Shiso Salt – Yaki Onigiri

Yukari Shiso Salt
This is very easy and no recipe is really needed…
Ingredients…
– Shiso leaf, dried, ground
– High quality sea salt, ground

Yukari Shiso
Directions…

Mix 1/3c shiso leaf with 2/3c sea salt
Place in sealed container for long term storage

Dashi

japanese dashi
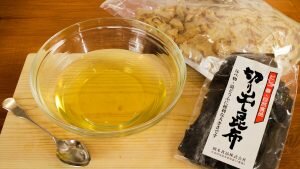
Not really a condiment as it is used as a base, to build other flavors from.  Used in many traditional Japanese dishes for that great added layer of flavor, called umami.  Simple to make, but it adds a lot of flavor to a dish.  Vegans and veggies can just make a seaweed and veggie dashi vs. using the bonito flakes.
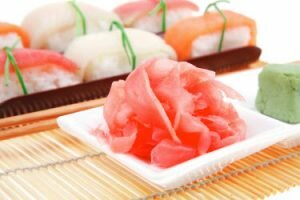
Ingredients…

– 2 (4-inch) square pieces kombu
– 2 1/2 quarts water
– 1/2-ounce bonito flakes or katsuobushi, about 2 cups
Note: For vegans make a vegetable broth w/ carrots, onions, seaweeds, garlic, and shiitake mushrooms

Directions…

Put the kombu in a 4-quart saucepan, cover with the water and soak for 30 minutes.

Set the saucepan over medium heat until the water reaches 150 to 160 degrees F and small bubbles appear around the sides of the pan, 9 to 10 minutes.

Remove the kombu from the pan. Increase the heat to high and bring to a boil, 5 to 6 minutes. Reduce the heat to low and add the bonito flakes. Simmer gently, stirring frequently, for 10 minutes.

Strain the liquid through a fine mesh strainer lined with muslin or several layers of cheesecloth. Reserve the bonito flakes for another use.

For long term storage, place in an airtight container in the refrigerator. Use within 1 week or freeze for up to a month.

Gari – Pickled Ginger

gari_pickled
Mostly known for its use as a condiment in sushi dishes, it has a great sweet zingy taste.
So easy to make and will last under refrigeration for a long time.

Ingredients…

6 ounces fresh ginger
¼ cup plus 1 Tbsp sugar
1 Tbsp sea salt
6 Tbsp plain unseasoned rice wine vinegar

Directions…

– Peel ginger and slice very thin, almost see through.
– Put ginger in a bowl with
– ¼ c of sugar and 1 Tbsp salt and mix together and let sit for 30 minutes.
– Boil enough water in a pot to cover the amount of ginger and cook the now marinated ginger slices in it for 45 seconds and drain through a strainer.
– Put hot ginger slices in a jar.
– Boil the rice vinegar and sugar together and pour over the ginger.

– Let sit out on the counter for 24 hours.

– Place jars into the refrigerator and leave at least 1 week before tasting. Taste will improve with time; a month in the fridge does well.  It will keep well for 6 months.

We hope you have enjoyed learning some new recipes that will make any meal tastier no matter if you’re a vegan, veggie, or meat eater.

Many of the items can be fermented, if one likes, or ingredients can be cultured, too

Live, Grow, and Share Cultured Foods !


Fermented & Pickled Condiments in the Korean Style


This is a standard plate served at meals in our house, in Korea they do the same.  Called banchan, they are set in the middle of the table to be shared.  At the center of the table is the secondary main course, such as galbi or bulgogi, and a shared pot of jjigae.  Bowls of cooked rice and guk (soup) are set individually.  Banchan are served in small portions, meant to be finished at each meal and are replenished during the meal if not enough.
 
This method of eating allows each person to customize their dish to with flavor, heat, and spice.
Who can guess the condiments in the photo?
I start you off with B.R. – gochujang – hot fermented chili paste
B.L. – fresh Japanese wasabi paste
Good luck!
Fermented & pickled condiments in the Korean Style


Tsukemono Pickled & Fermented Condiments Part 2

Here’s part two of our Blog on Tsukemono
type pickles from Japan.
These are great for eating plain or a side dish,
a condiment, or mixed with plain rice!
Listed below are recipes that have been modified from the traditional form for the USA consumer as some ingredients are hard to find.
fermented picklesWhat is Tsukemono?

Tsukemono (漬物?, literally “pickled things”) are Japanese style preserved vegetables (usually pickled in salt, brine, or a bed of nuka  rice bran).  Many are served with rice as an okazu (side dish), with drinks as an otsumami (snack), as an accompaniment to or garnish for meals, and as a course in the kaiseki portion of a Japanese tea ceremony.

Type Kanji Pickling Ingredient
Shiozuke 塩漬け salt
Suzuke 酢漬け vinegar
Amasuzuke 甘酢漬け sugar and vinegar
Misozuke 味噌漬け miso
Shoyuzuke 醤油漬け soy sauce
Kasuzuke 粕漬け sake kasu (sake lees)
Koji 塩麹 malted rice
Nukazuke 糠漬け rice bran
Karashizuke からし漬け hot mustard
Satozuke 砂糖漬け sugar

Today we’ll look at some new recipes that you can make at home.  Place in the refrigerator and they can last for weeks…

Shibadsuke –


Sliced cucumber and tree ear mushroom salted and pickled with red shiso.

To make yourself, use any hearty mushroom that will hold it’s shape.
– Start by cutting fresh cucumber in half, removing the seeds and skin, then cut into thin strips.
– Soak the mushrooms, if dried, in enough water to cover.  Once soft cut into thin strips.  We used shiitake mushrooms.
– Bring the required amount(dependent on batch size) of rice wine vinegar to a boil, remove from heat, and add the shiso leaf and mushrooms.  Allow to simmer until colour turns red and taste develops.  If you don’t have shiso leaf try a Japanese shop or grow your own.  You may be able to find the leaf already pickled, too.
– Remove from heat and add the cucumber slices.  Mix together.
Add sea salt to taste.  Allow mixture to set covered with vinegar at room temperature for 3 to 5 days.  Then pack into jars and keep in refrigerator.  Will keep for a month or more if kept cold and under brine.  Hint: Add a little extra vinegar if liquid is not enough.

Here’s a photo of our results…
Shibadsuke


Sesame & Kombu –

Sesame & Kombu

Strip of kombu vegetable is cooked with sugar and soy sauce with bonito dashi.  This is one of our favorites hands down.  The saltiness of the sea combined with sweet sugar and rich soy sauce!
This Japanese quick pickle is easy to make…
– Start by washing the kombu and soaking until soft.
– With the kombu soaking, make a dashi broth by bringing the amount of water needed to a boil.  Once water boils, remove from heat and add bonito flakes (a type of dried fish, shaved very thin).  For good flavor you’ll want about a 1/2oz per 4 cups water.  Once flakes the are steeped, strain liquid to remove the flakes.  We like to eat the fish flakes, so they don’t have to be removed.
– Cut the kombu into thin strips
– Place the cut kombu into the broth and add sugar and soy sauce to taste.

– Allow to simmer until liquid concentrates then add the sesame seeds at the end.  Adjust sugar and soy as needed, to taste.

Allow mixture to set covered with vinegar at room temperature for 3 to 5 days.  Then pack into jars and keep in refrigerator.  Will keep for a month or more if kept cold and under brine.

Here’s a photo of our results…

Sesame & Kombu

Ginger & Kombu –
ginger kombu pickle

Strip of kombu is cooked with sugar and soy sauce with bonito dashi.
Hint of ginger taste.

The same as making the sesame and kombu recipe but with the use of ginger root verse sesame seeds.

– Start by washing the kombu and soaking until soft.
– With the kombu soaking, make a dashi broth by bringing the amount of water needed to a boil.  Once water boils, remove from heat and add bonito flakes(a type of dried fish, shaved very thin).  For good flavor you’ll want about a 1/2oz per 4 cups water.  Once flakes the are steeped, strain liquid to remove the flakes.  We like to eat the fish flakes, so they don’t have to be removed.
– Cut the kombu into thin strips
– Place the cut kombu into the broth and add sugar, sliced or grated ginger and soy sauce to taste.  Note: ginger root is strong to taste so not much is needed.

– Allow to simmer until liquid concentrates.  Adjust sugar and soy as needed, to taste.

Allow mixture to set covered with vinegar at room temperature for 3 to 5 days.  Then pack into jars and keep in refrigerator.  Will keep for a month or more if kept cold and under brine.

Fuki Sansho –

Fuki Sansho

Fuki is a kind of edible wild plant in mountain side in Japan.
Picked in Yamagata or Akita prefecture, north part of Japan.
Simmered in sweet sugar and soy sauce.
A hint of  Japanese pepper tree seed.
This one we have not tried, but it could work with many plants.
The method is the same to simmer the plant in sugar and soy sauce.
The recipe is finished with a hint of strong pepper, like schezwan pepper.
Experiment with this one and see how it goes!

More recipes for Japanese cultured foods
See more at our main site – organic-cultures.com


Tsukemono Pickled Garlic – Three Great Recipes for Japanese Garlic

Pickled Garlic – Three Great Recipes for Japanese Garlic Tsukemono

In our quest to provide you with culturing recipes to use with your ferments, we have three great uses for garlic in the Tsukemono Japanese style. All the recipes are easy to make and provides the healing properties of garlic. Try a small batch of each to see which ones you like best! Recipes from the book: Tsukemono – Japanese Pickling Recipes by Ikuko Hisamatsu

Garlic in Miso – Ninniku Miso-zuke

This reminds me of the ‘stamina’ soups we would get at little Japanese shops in Tokyo and Atsugi (厚木市, Atsugi-shi is a city located in central Kanagawa Prefecture)
Known to be the ‘stamina builder’, which is used as an appetizer, condiment, or pickle. Just a little goes a long way. The strong garlic smell will reduce in time of about a month or more. The miso will preserve the garlic for long-term storage.

garlic in miso

What is Needed:
– 9 oz of fresh garlic
– 9 oz of aged miso (We suggest using a dark miso, however, any miso will work)  Make sure to use an unpasteurized miso.
– 3 to 4 tbsp mirin (or a sweetener if you cannot find mirin)

Directions:
1. Start by separating the cloves of garlic, trim off the roots and outer skin. Make sure to remove the thin membrane under the outer skin.
2. Bring a pot of water to a boil and add the garlic. Briefly blanch  the cloves, remove from pot, and drain.
3. Pat the garlic dry, being careful not the break or damage the cloves.
4. Combine the miso paste and mirin.
5. Place a layer of miso in the bottom of the packing jar. Add cloves and cover with more miso. Keep adding layers of miso and garlic. Top off the packing jar with a layer of miso. Make sure no garlic is exposed.  You can also add a layer of salt at this time, which will help keep mold from forming.
6. Seal the packing jar or container and allow to sit in a cool place for a month or more. Store the container in the refrigerator during the summer months or in hotter locations.

garlic miso eggplant
Japanese eggplant with garlic miso paste

Once ready for use, the cloves can be either eaten by themselves or added to other dishes.  Use a light miso for a sweeter batch and a dark or brown miso for stronger taste.  Try making a little of both and see which is liked best.  Makes a great garnish for barbecued meat dishes.  Also, nice to thinly slice and add to stir-fries or to season plane rice. Enjoy

Garlic Honey – Ninniku Hachimitsu-zuke

This is a great cultured ferment for the winter season!  Easy to make and loaded with cold and flu fighting properties.  We recommend using RAW honey for the best taste and beneficial remedies.  The honey is ready in as little as 2 to 3 days. Wait around a month or more to eat the garlic cloves.  The garlic will start to break down if left to sit to long, best to make smaller batches to use within a month or two.
The honey gives a nice sweet garlic flavor for many dishes.  Or if your a garlic fan you can eat the cloves, like candy.
The garlic infused honey, when thinned down with water, makes a great hot or cold drink to enjoy or as a cold remedy!  One can find many benefits to using this recipe for health and well being.

garlic in raw honey
Garlic steeped in raw honey

What is Needed:
– 10 oz (300g) Fresh garlic
– 7 to 9 oz (200-250g) Raw Honey

Directions:
1. Start by separating the cloves of garlic, trim off the roots and outer skin. Make sure to remove the thin membrane under the outer skin.
2. Wash and pat the garlic dry, being careful not the break or damage the cloves.
3. Prepare a small packing jar by boiling in water to sterilize also called a water bath.
4. Pack the garlic cloves into the sterilized container. Pour over the honey. Allow the honey to set for a minute and top off, making sure to cover all the cloves.
5. Cover with lid and allow to sit in a cool dark place.  Fermentation times very, after a couple of days one should see bubbles forming in the honey mixture.  After a week, place in cold storage for better long term preservation. Enjoy!

Garlic in Soy Sauce – Ninniku Shoyu-zuke

This recipe works well to rid the garlic of the strong odor.  This recipe comes from Korea, but incorporates well into many dishes. Fresh garlic is the best.  Use a local source if possible(Support your local farmer).   Select well-proportioned bulbs as they are served in halves.  Takes about two months before ready for use or when the odor diminishes.

garlic in soysauce
Garlic steeped in Shuyo

What is Needed:
– 10 whole garlic bulbs
– 2 cups rice vinegar
– 1 ¼ c shoyu or favorite soy sauce
– 2 tbsp sugar or mirin to taste

Directions:
1. Choose round uniform bulbs that will form pretty plum blossoms when cut horizontally in half.
2. Peel the outer skin leaving only a single layer of skin to hold the garlic bulbs together. Trim away the stem for better packing.
3. Prepare a small packing jar by boiling in water to sterilize also called a water bath.
4. Pack the jar or container with the garlic bulbs. Add the rice vinegar and allow to stand, covered, in a dark space for two weeks.
5. After the two-week period, pour off 2/3rds of the vinegar (keep for other uses such as salad dressing).

garlic in shuyo
Both the rice vinegar soaking and shoyu steeping

6. Mix the soy sauce and sugar until sugar dissolves. Warming the soy sauce will help combine the sugar.
7. Pour the mixture into the garlic/vinegar mixture and cover with lid.  Date and label jar to know when the ferment is ready.
8. Just before serving, cut horizontally in half. Enjoy!

Enjoy these new uses for garlic throughout the winter time for stronger
immunity and health.
Happy Culturing…Live, Grow, Share Cultured Foods!