Category Archives: Fermentation

Fermentation tips and tricks for the beginner or experienced culturist.

Fermented Salts

Shio rice koji

Using a fermented salt product verses using plain sea salt in dishes using a salt that has been added to a fermented product allows the use of sea salt and the benefits of cultured/fermentation.

Shio Koji…
We use shio-koji instead of salt in almost all of our cooking now, so it goes pretty quickly. Easy to make with 3 ingredients… rice koji, sea salt, and filtered water. This is a very salted product as salt should be the amount of salt may be reduced or more water added.

Here is the recipe for shio-koji. It only takes about 15 minutes to prepare and then a little more than a week to ferment:

  • 500 gm fresh rice koji
  • 170 gm sea salt
  • 650 cc water
  • Put the koji in a bowl and rub with your hands to break apart any clumps.
  • Add the salt and mix with your hands, kneading the salt and koji together. Myoho always emphasizes that it’s important to put your heart into mixing the shio-koji- think positive thoughts and give appreciation for the koji- the finished product will be more delicious and satisfying.
  • Mix until the mixture becomes slightly sticky and it clumps when squeezed.
  • Add the water and stir well.
  • Put in a loosely lidded container and let it sit at room temperature for 10-14 days until the rice grains become smaller and the mixture has a slightly salty sweet aroma. Stir the mixture well once a day. Here is the full Blog post for making shio koji.

Salted Black Beans…

Next we have salted black beans. Called Chinese douchi – Fermented Black Beans in China. Use this condiment in many recipes especially Latin inspired dishes like tacos, burritos, or even nachos. It includes Chinese black beans or standard black beans, rice koji, and sea salt of your choice. Ratio is 4 parts beans, 1 part rice koji, and sea salt at a rate of at least 3% by weight. Feel free to use more sea salt if desired or even better use fresh made shio koji(salt koji).

The beans can be left whole or mashed into a paste.

We hope you will use these wonderful recipes vs. plane sea salt. See more at Organic-Cultures Blog for shio-koji and mock dry aged steak.

Garum & Tekka

Tekka – A Miso Condiment

In Japan, there is not a tradition of sprinkling raw salt on their food, instead, they prepare condiments in which salt is either cooked with other ingredients or roasted and ground prior to use. Tekka is prepared in this tradition with its saltiness coming solely from hatcho miso. Tekka should be used sparingly as it is very concentrated and flavourful. Add to soups, sprinkle over cooked rice, or use to make miso soup.

Tekka is a rich, hearty and concentrated condiment that is moist yet powdery. It is made using time-consuming and laborious processes: first gently sautéing chopped burdock root, carrots, lotus root, or other roots vegetables in sesame oil. Hatcho (soya bean) miso is then added and this is simmered in an iron pot or a cast iron dutch oven for six hours of simmering where all the liquid evaporates leaving a condiment deeply black in color while crumbly and semi-dry in texture. Chopped ginger is added
at the end for additional flavor.

Tekka is made with milled carrots, burdock root, lotus root, and ground sesame seeds. It is cooked with sesame oil and hacho miso. Sprinkle over cooked grain, noodles, vegetables, and salad to add a
flavorful taste to your food.

What’s Needed…

– A cast iron pan or dutch oven
– Root vegetables of choice. Traditionally burdock, lotus, carrots, and ginger roots are used.
– A hand grater or food processor as the roots need to be chopped veryfine

Directions…


~ Using Malted Rice Koji: Shio Koji, Dry-Aging, & Amasake ~

As fermented and cultured foods are becoming more popular …being served more in Western restaurants, on store shelves, and home pantries. But one that might not be very familiar is koji rice.
Mainly because it’s a fermented food that’s hiding inside another fermented food.
Today, we will introduce some different ways to use koji rice in recipes and dishes:

Shio Koji or Koji Salt
– Mock Dry Rub Steak
– Amasake Rice Beverage

cultured rice

Koji rice is steamed rice that has been inoculated with Aspergillus oryzae, a mold that ’s widespread in Japan. The mold releases enzymes that ferment the rice by decomposing its carbohydrates and proteins. This process can also be applied to other
grains like barley or soybeans.

To make koji rice, the mold culture Aspergillus Oryzae is added to the cooked sushi rice. The rice kernels are then placed in wooden trays and left to ferment in a warm, humid environment
for up to 50 hours.
The result is essentially molded rice, but don’t be put off by it immediately. What makes koji so special is that it digests starches and proteins and breaks them down into sugars and amino acids. The taste of the finished malted rice is sweet. Because of this, it can be used as a starter for a number of fermented Japanese food products, including amasake, mirin, sake,
shoyu soy sauce, and miso.

koji making

Shio Koji (塩麹, 塩糀) – A century-old natural seasoning used in Japanese cooking to marinate, tenderize, and enhance umami flavor of a dish.
It’s made of just a few simple ingredients: salt, water, and rice koji.
You can use shio koji to marinade meats, make pickles, flavor your vegetables or use it as a salt substitute.  In a recipe that calls for one teaspoon of salt, you can substitute with 2 teaspoons of shio-koji.  Shio-koji is really versatile and can be used in any kind of cooking.

mixing shio

~ Benefits of Shio Koji ~

Because it is a fermented ingredient, shio koji is known for its many health benefits, which includes:

  • A natural pro-biotic seasoning
  • Tenderizes food
  • Brings out the umami and sweetness in foods
  • Reduces the intake of salt
  • Aids in digestion
  • Clear the skin
  • Anti-aging
  • Contains minerals, fiber and vitamins

Shio Koji Recipe

What is needed to get started…
– 375g fresh koji rice
– 110g sea salt, 30% of the weight of the koji
– 560ml good quality water

First, wash your hands and sanitize a glass or metal container. Then rub the koji rice and salt between the hands mixing thoroughly.
Add the water to the shio and stir.

shio koji

Cover and keep in a warm place around 27 to 37 Deg C. Stir twice a day for 1 to 2 weeks. The amount of time can vary with the summer or winter temperature.

Now you can use the shio koji rice in many Japanese style dishes. You can marinade meats, make pickles, or just use your shio-koji as a salt substitute. Shio-koji is incredibly versatile and can be used in any kind of cooking. It will keep in the refrigerator for a good amount of time remembering to label & date. – Fin

~ Mock Dry-Aged Shio Koji Steak ~

Here’s a quick way of dry aging a steak without the time or higher prices for real dry aged. This method seems to be taking storm in the USA.

Dry-aged meat is amazing and certainly worth buying when you can afford it. However, a “mock” dry aging that tastes just as good as dry-aged meat, for a considerably smaller price tag and shorter time frame.

mock dry aged steak
steak rice

What is Needed…
– Steak, any cut desired, cheaper cuts seem to be a better deal.
– Koji rice, enough to cover the steak, purchase here or make your own koji rice.
– Time of about 2 to 3 days

Start by prepping and trimming the steak, if needed. The koji rice can be ground up into a powder or left as whole grains. Rub all sides of the meat (Use cheaper steak cuts for best results) generously and then let it sit uncovered on a wire rack in the fridge for 2-3 days. Don’t allow to sit too long or the meat starts to get too tough and begins to almost cure. After 12 hours, the meat starts to look like a moist, snow-covered slab of steak. The aroma is just as rich and nutty with a touch of sweetness, just as a steak that’s been dry-aging for over a month.

dry-aged steak

Before cooking, rinse the meat thoroughly in cold water to remove all the koji, then pat dry. Next, season the meat with salt and sear it in a cast-iron pan or cook normally. The dry-aged rubbed steak will caramelize and pick up color much faster than a normal steak. – Fin

~ Sweet Amasake Rice Beverage ~

Used in Japan as a sweetener, beverage, or a simple alcoholic drink. Amazake is one of the best known cultured and fermented items from Japan. There are several recipes for amazake that have been used for hundreds of years. By a popular recipe, kōji is added to cooled whole grain rice causing enzymes to break down the carbohydrates into simpler unrefined sugars. As the mixture incubates, sweetness develops naturally. By another popular recipe, sake kasu is simply mixed with water, but usually, sugar is added.
In this recipe, amazake becomes low-alcohol beverage if given time.

amasake beverage

Amazake can be used as a dessert snack, natural sweetening agent, food for infants, added in salad dressing or smoothies. The traditional drink (prepared by combining amazake and water, heated to a simmer, and often topped with a pinch of finely grated ginger) was popular with street vendors. It is still served at inns, tea houses, and at festivals.
Many Shinto shrines in Japan provide or sell it during the New Year!

Malted rice amasake

What is Needed…
– 3c cooked brown rice
– 1c of malted koji rice. If koji rice is needed…order here

Yield: 4 cups of fermented rice to use as a sweetener or 3 quarts Amazaké drink

Incubation Temperature: 120-140 F (50-60C)

doburoku

Start by cooking the brown rice and allowing it to cool to at least 120 F (50C). Once cooled, stir in the koji rice and mix well. Place mixture into a glass or stainless steel container that will allow an inch of “headroom” to allow for expansion during the fermentation process. Cover container and incubate, stirring every couple of hours to prevent heat buildup. The finished product can take as little as 6 hours with quality, fresh (not dried) koji-kin at optimum temperatures after 6 hours start tasting the ferment to see if the cycle is complete.

When finished the ferment should thicken like porridge with a mild sweet taste. The sweetness will increase up to a point after which it will change and start to become sour. Once the taste is to your liking, place into a saucepan and bring to a boil. Reduce the heat and simmer for 3 to 5 min., stirring frequently. Boiling will stop the fermentation process keeping the amazaké sweet. For a smother amazaké consistency purée the mixture in a blender until smooth. Refrigerate any ferment not used right away. If not, the amazaké will become very sour. A little fresh ground ginger may also be added.

Use the finished product to make a non-sugar sweetener, a beverage, even a simple grog called, Doburoku ( どぶろく or 濁酒 ).
– Fin

We hope you have enjoyed finding new ways of using fermented and cultured foods. See our store for more items like rice koji, spores, and accessories. Store.Organic-Cultures.Com

~ Simple Japanese Nori Condiments ~

Japan condiments nori

5 Fermented Recipes for Classic Sea Vegetable Japanese Condiments

Tsukudani (佃煮) is small seafood, meat or seaweed that has been simmered in soy sauce and mirin.
High osmotic pressure preserves the ingredients.
Its name originates from Tsukudajima, the island (in present-day Chūō, Tokyo) where it was first made in the Edo period. Many kinds of tsukudani are sold. Traditionally made tsukudani is preservable and has been favored as a storable side dish in Japanese kitchens since the Edo period.

Tsukudani can be made with kombu, nori, or wakame seaweeds. It is usually eaten with steamed rice as a flavoring agent since the flavor is very intense (approximately 1 tbsp for one bowl of rice). Finished tsukudani is served chilled from the refrigerator where it takes on a gelatinous texture.

Here are some simple to make Japanese condiments. All of the raw nori seaweed is ground, mixed with other ingredients, and then slightly fermented for 2 to 3 days. Then keep jars in the refrigerator for longer shelf life. We like to use smaller jars like 1/2 pint size for a fresher product and ease of table use.

Make these fresh healthy seaweed condiments to enhance plan rice or other entrees.

– Gohandesuyo, Seaweed Paste

Nori seaweed with shoyu and dashi broth

Simple to make by grinding nori sheets then adding shoyu soy sauce and dashi broth until the desired consistency is obtained. Add a bit of water if needed to make a thick paste.
Mix all the ingredients and pack into jars. Ferment for 2 to 3 days at room temperature then
place in refrigerator.

– Red Pepper, Nori Seaweed Paste

Nori seaweed with chili oil

Make the same as Gohandesuyo with the addition of chillis to your liking. You can buy a premade chili paste or make it fresh. The amount of chili to nori can vary by the type of pepper used and taste.
Add a bit of water if needed to make a thick paste.
Mix all the ingredients and pack into jars. Ferment for 2 to 3 days at room temperature then
place in refrigerator.

– Umebosi Pickled Plum Nori Tsukudani

umeboshi plum tsukudani

This condiment is nice and sweet from the plumbs and contains a depth of flavor from the shiso.

Again make as you would gohandesuyo but now mixed with umeboshi plums/paste and fresh shiso leaf. Mix all the ingredients and pack into jars. Ferment for 2 to 3 days at room temperature then
place in refrigerator.

Yuzu Kosho Tsukudani

Yuzu lemon peel and chilis are added to the basic nori seaweed paste…

Start with grinding the nori sheets and adding yuzu peel and chili to taste. Mix all the ingredients and pack into jars. Ferment for 2 to 3 days at room temperature then place in refrigerator.

Taberu Rayu Tsukudani

Chili oil with fried onions and garlic…

Start by frying off onions in sesame oil then add the garlic and fry till all ingredients are finished. Remove from heat. Now add in the chili oil to form
a thick paste.

The ratio is about 2 parts onions to 1 part garlic and 1 part chili oil. Of course, this can be changed to your liking. A little soy sauce and sugar can also be added. Mix all the ingredients and pack into jars. Ferment for 2 to 3 days at room temperature then
place in refrigerator.

Other flavor types to try…
– Kameya Wasabi Nori Seaweed Tsukudani
– Nori Tsukudani Shijimi(clams) Seasoned
– Yasuda Yakinori Iri Tsukudani (Nori in sweet shoyu)

Try it with different meat, seafood, or othe types of sea vegiables.

Condiments can enhance dishes and provide healthy flavors to dishes. Have fun making these delightful additions to meals.

Happy Culturing! Live, Grow, Share Cultured Foods
.


~ What is Mongolia Milk Airag and Kumis? ~

airag milk

What is Airag?

Airag is the traditional national beverage of Mongolia. The most important animal of the Mongols is the horse. Horses don’t only serve as riding animals, the mare’s milk also has a special status. A glass of homemade Mongolian airag is said to bring health and vitality. Also known as kumis, it is made by fermenting raw unpasteurized mare’s milk over the course of hours or days, often while stirring or churning (The physical agitation has similarities to making butter). During the fermentation, lactobacilli bacteria acidify the milk, and yeasts turn it into a carbonated and mildly alcoholic drink.

How Fermented Airag is Used…

airag milk

Airag refreshes and sparkles softly on the tongue. It contains a small amount of carbon dioxide and a low amount of only 2% of alcohol. The taste is slightly sour, but quite agreeable after getting used to it. The exact taste depends on both of the characteristics of the pastures and the exact method of production. The beverage is a rich source of vitamins and minerals for the nomads. A Mongolian will normally empty it, but it is also acceptable to just take a sip and return the bowl. To reject the offer right away
would be gravely impolite.

Similar to Isgelen Tarag (Kefir), it is possible, but not as common, to distill Airag into Mongol Arkhi (milk liquor).

Strictly speaking, kumis is in its own category of alcoholic drinks because it is made neither from fruit nor from grain. Technically, it is closer to wine than to beer because the fermentation occurs directly from sugars, as in wine (usually from fruit), as opposed to from starches (usually from grain) converted to sugars by mashing, as in beer. But in terms of experience and traditional manner of consumption, it is much more comparable to beer.
It is even milder in alcoholic content than beer.
It is arguably the region’s beer equivalent.

Kumis is very light in body compared to most dairy drinks. It has a unique, slightly sour flavor with a bite from the mild alcoholic content. The exact flavor is greatly variable
between different producers.

Kumis is usually served cold or chilled. Traditionally it is sipped out of small, handle-less, bowl-shaped cups or saucers, called piyala.

How Airag is Made…

The milk is filtered through a cloth and then poured into a large open leather sack called a Khukhuur, which is usually suspended next to the entrance of the yurt. Alternatively, a vat from larch wood (Gan), or in modern times plastic, can be used. Within this container, the milk gets stirred with a wooden masher or buluur.

leather airag milk
milk fermentation

The stirring needs to be repeated regularly over one or two days. Traditionally, anyone entering or leaving the yurt would do a few strokes. The fermentation process is caused by a combination of lactic acid bacteria and yeast, similar to Kefir.
The stirring makes sure that all parts of the milk are
fermented equally.

Traditionally, this fermentation took place in horse-hide containers, which might be left on the top of a yurt and turned over on occasion, or strapped to a saddle and joggled around over the course of a day’s riding. Today, a wooden vat or plastic barrel may be used
in place of the leather container.

Enjoy and Happy Culturing!
See our web store for all your culturing and fermentation needs:
Organic Cultures Store

undefined

~ Wild Yeast Fermentations ~

  This post will cover fermentation with wild yeast and bacteria.  Before the isolation of yeast strains by traditional peoples the use of wild yeast was the only way to prolong food stores.  However, other methods were used, too, like drying and salting of meats and fish or seeds and grains.
Later, through the years, each culture of indigenous peoples saved certain culture strains for continued use until today. These included yogurt bacteria, molds used for tempeh and koji, and bacteria/yeast used for water kefir and kombucha.
grape water kefir

Basically, what yeast does is convert sugar into alcohol and carbon dioxide gas (CO2).  In fact, if you take a look at the origin of the word yeast, you’ll discover that it comes from the Old English gist and Old High German jesen or gesen, which mean “to ferment.”  You may not realize it, but wild yeast spores are present everywhere. They’re in the air we breathe; in plants, flowers, fruits, and soil.  With continued experimentation with fermenting and brewing, one will keep finding more and more sources of wild yeast.

Those who wild craft for food stocks know how potent the wild yeasts are in nature.  One of the better-known foods that carry wild yeast is berries.  Blackberries and raspberries placed in a sugar liquid produced a nice effervescent beverage that can be taken home or used right in the field the next day when camping or hiking.  Black elderberries, whether fresh or naturally dried, also produces a nice fizzy elixir when made in the same manner.
Another well know fruiting body that carries beneficial bacteria are vineyard grapes or wild ones. This is seen as a white residue on the outside of the grapes.
grape yeast
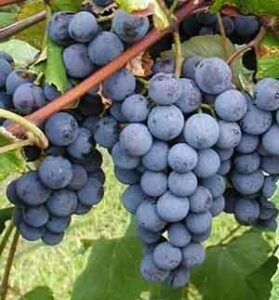
Rose hips harvested after the first frost also contains wild yeast and/or bacteria.  Any type of wild edible berry will contain the yeast and bacteria needed for making fermented beverages.

~ Good Sources of Wild Yeasts ~

rose hips elderberries– Organic grapes, plums, fruits that have a white bloom.
– Elderberries
– Wild Grapes
– Elderflowers
– Blueberries
blackberries– Blackberries/Raspberries
– Fresh or Dried Figs
– Prickly pear fruits
– Tree barks—birch (
Betula spp.) and aspen (Populus spp.).
– Unripe pine cones. My pinyon pine cones were loaded with yeast, and many people have reported excellent results using unripe pine cones from their local pines.
– Pinyon pine or white pine branches.
– Raw local honey
– 
A lot of unwashed organic fruits (apples, peaches, lemons, etc.) are also excellent sources of yeast. Make sure they’re organic and clean.

~ Other Items That Contain Beneficial
Wild Yeast ~

bee pollenThere are other items found in nature that allows for fermentation.  Pollen from flowers contains wild yeast, so many are used for culturing pro-biotic drinks.  Massive amounts of yeast are within the bee pollen from the array of flowers that the bees have collected.
Pollen extracts are sometimes used to help desensitize plants to which they are allergic.  In addition, melbrosia, a mixture of fermented bee pollen, flower pollen and royal jelly, may treat menopausal symptoms in women, including headaches and urinary incontinence.
Pollen contains many nutrients(enzymes and high-quality proteins).  However, due to the external structure of the cell wall, it is hard for humans to digest and use these nutrients. Adding the pollen to milk kefir or water kefir grains allows the cell wall to break down.

Here are a couple of recipes for using bee pollen for a healthy probiotic beverage:

fermented pollenSuper – Pollen – D’Probiotica

For Dairy Kefir:
– Add 1 tbsp of fresh bee pollen to 1 cup strained kefir. Ferment in a glass jar with the lids cracked slightly or use an air-lock to vent.  Ripen at room temperature for 1 to 3 days day tell fermentation starts or to one’s liking.
For Water Kefir:
– Add 1 tbsp bee pollen to 2 cups finished water kefir liquid.
Ferment for 48 hours or to taste.

bee with pollenThe Butterfly

A great fruity beverage to use some milk kefir.
– 2/3 cup of dark grape juice
– 1/3 cup fresh milk kefir(grains removed)
– 1 tbsp of fresh pollen
– A slice of lemon or orange, with peel
– Sprinkle of cinnamon

Start with the grape juice and add the pollen.   Now add the dairy kefir, swirl a bit with a straw or chopstick to marble the beverage.  Allow this to set for a few hours to incorporate and break down the bee pollen.

bee kaurtWild Nettle or Dandelion, Raw Bee Pollen, & Raw Honey Kraut

Here a great recipe to make sauerkraut using wild crafted ingredients:
– To begin you will need a 1/2 gallon-sized ball jar, 1 medium cabbage, fresh nettle or dandelion leaves, local raw honey, raw bee pollen, and some sea salt.
– Now core and shred the cabbage, salt it to taste then spread on a tray or large bowl.  Use as much salt to taste, common is 2 to 3 % salt brine.  Allow this to sit for an hour for the salt to start breaking down the cabbage.
– Pound the cabbage with a wooden hammer (or a rolling pin can work) until the juices start to release and the cabbage softens.
– Mix with bee pollen, drizzle honey and sprinkle in cleaned and greens, with steams removed.  Add these ingredients to one’s liking.
– Place in a wide mouth ball jar and press down with your fist (you can use a cabbage leaf as a top barrier and then press on that) until the veg is submerged in liquid. If there is not enough liquid to start, check it in a few hours as the cabbage breaks down more.
– Cover and leave at room temp for about 5-10 days.  Check on the sauerkraut and keep pressing it down below the liquid and release the gas occasionally as it starts to ferment.  The kraut should taste tart yet sweet from the honey when it’s ready…  if stronger sauerkraut is desired leave it at room temperature. When you are satisfied with the taste, transfer to cold storage where it will last for up to 12 months.

  There are many ways to collect and use wild yeast from nature.  Unlike standard yeast used for yogurts or miso wild yeast can vary in strength and potency.  This can affect the results of the finished beverage, however, most will turn out with high rates of effervesce.  Try using other flowers and fruits or even leaves from edible wildcrafted plants.
– Fin


Fermented Beet and Cultured Goat Cheese Spread

~ Fermented Beet and Goat Cheese ~

beet kvass
Shockingly pink beet colour, this spread makes a wonderful appetizer or addition to a cheese plate. Roasting the beets in their skins retains their intense color.  This recipe uses two cultures of beets and cheese.  Use this spread on toasted bread/flat bread, crackers, or as part of a cheese plate.

Ingredients Needed…

Fermented beet kvass, about 2 beets worth, skin on or off
– 2 teaspoons olive oil
– Pinch of salt
– Freshly ground black pepper, to taste
– 1 tablespoon balsamic vinegar
– Juice of ½ orange, fresh
– 4 ounces soft goat cheese (chèvre)

Directions…

making beet spread
1.  Use beets from the fresh made beet kvass.
2.  Cut into small pieces and purée in food processor with olive oil.
3.  Add balsamic vinegar and orange juice and mix until smooth.
4.  Add goat cheese and mix for another minute or two.
5.  Taste and adjust seasonings as desired.

Keep refrigerated.
Live, Grow, and Share Cultured Foods…Happy Culturing!
See our online store for all your culturing needs – store.organic-cultures.com

Lemongina / Limegina Drink

~ Fermented – Vegan ~

 Lemongina
This is an excellent fermented sports drink containing electrolytes, vitamins, and some protein.   Easy top make with some common ingredients.  Very refreshing when a pick-me-up drink is needed!

Ingredients Needed…

  • 1 Quart (1 L) filtered water
  • 1⁄2 Cup (100 g) granulated sugar or use 3/4 cup honey
  • Pinch of sea salt
  • Juice of 4 lemons, limes, or a combination
  • 1⁄2 Cup (125 ml) live Dairy whey, water kefir starter, or wild yeast fermentation
  • 1⁄4 Cup (65 g) frozen raspberries or strawberries (optional)

Lemongina

Directions…

  • Warm 1 pint (500 ml) of water in a pot over low heat. Stir in the sugar and salt until dissolved. Remove from the heat, add the remaining 1 pint (500 ml) of water, and let it cool down below body temperature. Add the lemon juice, whey, and raspberries (if using).
  • Pour the Lemongina into a glass or ceramic jar and close the lid and shake.  Write the brewing date on a piece of masking tape and stick it to the outside of the jar.
  • Let it sit at room temperature for 3 to 7 days, depending on the temperature.  Agitate at least once a day to prevent mold from forming.  Begin tasting at the first sign of bubbles. It is done when it is fizzy and sour and tangy.  Refrigerate once it reaches desired taste.  The raspberries may be removed or left in.

Yields: 4 Servings (8 oz/250 ml, Each)

strawberry Lemongina
Fresh Strawberry Lemongina

Try this refreshing beverage for those hot summer days when a nice cool drink is desired.  Said to be a great mixer for a ‘gin and tonic’. Don’t forget to check out Tepache recipe, in the files section, for a fruitier beverage also from Mexico!

For culturing starters, like kefir, koji spores, or Kombucha and fermentation supplies visit our Organic-Cultures online store.

Live, Grow, and Share Cultured Foods…Happy Culturing!

~ Fermentationed Tonics for Winter Time & Immunity Building ~

RAW – Fermented – Vegan

Fermented Garlic in Honey – Ninniku Hachimitsu-zuke

garlic in raw honey

This is a great cultured ferment for the winter season!
Easy to make and loaded with cold and flu fighting properties.
We recommend using RAW honey for the best taste and beneficial remedies.  The honey is ready in as little as 2 to 3 days.  Wait around a month or more to eat the garlic cloves and to allow full fermentation.  The garlic will start to break down if left to sit to long, best to make smaller batches to use within a month
or two after fermenting.
The honey gives a nice sweet and strong garlic flavor
for many dishes.
Or if your a garlic fan you can eat the cloves, like candy.
The garlic infused honey, when thinned down with water, makes a great hot or cold drink to enjoy or as a cold remedy!
One can find many benefits to using this recipe for
health and well being.

What is Needed:
– 10 oz (300g) Fresh garlic
– 7 to 9 oz (200-250g) Raw Honey

Directions:
1.  Start by separating the cloves of garlic, trim off the roots and outer skin.  Make sure to remove the thin membrane under the outer skin.
2.  Wash and pat the garlic dry, being careful not the break or damage the cloves.  However, some will slightly break open the cloves to activate the allicin.  The results seem to be the same, but whole cloves seem to have a longer shelf life.
3.  Prepare a small packing jar by boiling in water to sterilize, also called a water bath.
4.  Pack the garlic cloves into the sterilized container.  Pour over the honey.  Allow the honey to set for a minute and top off, making sure to cover all the cloves.
5.  Cover with lid and allow to sit in a cool dark place.  Fermentation times very, after a couple of days one should see bubbles forming in the honey mixture or even a foam on top.
6.  For those who worry about botulism, you can also add a tsp of organic raw apple cider vinegar.  This only needs to be done if the pH is to high.  The mixture should read at 4.6 pH or lower, this should happen naturally.

After a months time, place in cold storage for better long term preservation.  Enjoy!


~ Elderberries in Raw Honey ~

elderberry honey

  Black elderberries have a rich history in herbal medicine and elderberry syrup is a must-have in any natural cold and flu medicine chest.  Elderberry syrup gained significant attention in the natural health community shortly after the H1N1 flu outbreak when a study was released demonstrating its ability to effectively inhibit this widespread strain of the flu (Roschek, et.al., 2009).  It be bought already prepared, however, it is very easy to make at home.

What’s the Proper Way to Make Elderberry Syrup?

It’s crucial that the elderberries are from a reputable source, that all excess twigs or unripe berries are removed, and that the berries are cooked sufficiently to eliminate the toxin that is found in the seeds.  Even when elderberries are dried before cooking and the syrup is strained, it is possible for this toxin to produce complications if the syrup is not cooked sufficiently.  Remember, the purpose of an extract is to extract the active constituents from the herbs; this includes toxins.

Ingredients Needed…
To make a proper batch of safe and effective elderberry syrup, you will need:
– 100 g dried elderberries
– 1 to 2 quarts cold distilled water
– 1 1/2 cup RAW honey
– Add other items such as fresh ginger root and/or cinnamon sticks

elder berry syrup

Directions…
–  Combine the berries and water in a large (cold) sauce pan. If time permits, allow the berries to soak until they are soft, about 30 – 60 minutes.
–  Place over medium heat and gradually bring to a boil. Once a rolling boil has been reached, reduce heat to a simmer and continue to cook for 30-45 minutes, stirring frequently.  You may have to add additional water to prevent burning the berries.
–  Do not cover the pot during this phase.  This process cannot be shortened as it is crucial for eliminating the cyanide-like toxin in the seeds.  Remove from heat and cool to room temperature.
–  Strain the concentrated extract and measure the liquid. It should be approximately 2 cups (If you have less than 2 cups, water can be added to reach 2 cups.  If you have more than two cups, continue boiling the mixture down.  It is crucial to have a 2-cup measurement at this state to ensure accurate dosing.  Combine with the cup and a half of honey.  Allow to cool slightly and pour into prepared bottles (which have been placed in a water bath.)
Allow to ferment a few days at room temperature, then store in the refrigerator.

Note: This can be a very active ferment.  Make sure to use an airlock or vent a couple times per day.  Even under refrigeration it will burp, due to the active wild yeast and RAW honey.

How Much Elderberry Syrup Can I Take?

The average dose used in studies to treat viral infections is 15ml of a syrup with 38% elderberry, 4x a day for adults and the same amount at a 19% concentration for children.  Commercial doses are often much less potent than those used in clinical studies.  For the equivalent of a single dose of a commercially prepared product, the formula provided above produces 35 total doses. (To determine dosing, measure the total amount of product you have and divide by 35.)

Note:  Keep in mind that the half-life of the active components in elderberry treatments is only a couple of hours total, so frequent dosing is required.  As a result, one dose per day will not be effective at either prevention or treatment.


~ Fire Cider Tonic ~

fire cider

  While most recipes for fire cider use a heavy hand with the garlic because of its potent medicinal properties, you should feel free to tweak and embrace the flexible nature of this recipe.  Fresh turmeric is a lovely substitute for dried – use about 3 tablespoons coarsely chopped or grated.  Also, one can use fresh chilies instead of dried hot chilies, use sliced fresh jalapeño or habanero, or even smoke-dried ones.  One benefit of using fresh is to impart more
wild yeast into the fermentation process.

Consider adding other citrus, such as grapefruit or blood oranges, in place of or in addition to the lemon.  Note: This tonic recipe needs to sit at room temperature and ferment for 1 month before enjoying.

fire cider tonic

Ingredients Needed…
This recipe makes around 2 cups of finished product. Fire cider tonic can be made 3 months ahead; store chilled in a (preferably glass) resealable container.

– 1 cup coarsely grated peeled horseradish (about 4 ounces)
– 1 small onion, coarsely chopped
– 8 large garlic cloves, smashed
– 1/2 cup peeled and coarsely grated or chopped ginger (about 3 ounces)
– 1 tablespoon ground turmeric
– 1 teaspoon black peppercorns
– 4 rosemary sprigs
– 1 whole clove
– 1 or 2 dried hot chilies or adjust to one’s liking
– 1 lemon, quartered/sliced or other acid type fruit
(This is a safety factor keeping the pH below the needed 4.6 pH)
– 2 cups (or more) unfiltered apple cider vinegar
– 2 tablespoons (or to taste) RAW honey

fire cider brew

Directions…
– Place horseradish, onion, garlic, ginger, turmeric, peppercorns, rosemary, and clove in quart jar.
– Crumble chilies into jar.
– Squeeze in lemon quarters; add rinds.
– Pour vinegar into jar until solids are fully submerged.
– Cover tightly, then swirl jar gently to combine.

Let stand in a dark spot 1 month.  After allotted time frame:

  1. Strain through a cheesecloth-lined colander or sieve into a large measuring cup; discard solids.  Gather up corners of cheesecloth to extract as much liquid as possible (wear gloves if you wish to avoid turmeric stains on your hands).  Rinse out jar and pour in liquid.  Add 2 Tbsp. honey, then shake covered jar or whisk to combine.  Add more honey to taste.
  2. You can transfer mixture to a few smaller bottles, such as swing-top bottles, as it’s easier to pour from this way.  Tightly seal and move into refrigerator for long term storage.

fire cider bottle

Ways to Use the Tonic…

Cold Preventative:
Sip by the spoonful when you feel a cold coming on. It can also diluted in water if taste is to strong.

Fire Cider Tea:
Add about 1 Tbsp. fire cider to a mug of hot water, along with a squeeze of fresh lemon juice and a little honey to sweeten. Finish with a bit of freshly ground black pepper.

Fire Cider Tonic:
This makes a great mocktail. Add about 1 Tbsp. fire cider and a squeeze of fresh orange juice to a glass of seltzer. Garnish with rosemary sprig.

Marinade:
Use on fish, chicken, or other dishes like tofu.
Think of fire cider as the acid in bright, assertive marinades similar to those for jerk chicken.


~ Golden Lemon Drop Honey Tonic ~

lemon honey

A great tonic for sore throats and the to combat on coming colds! This is an easy to make tonic that can be made in just a few days.
Stress can come from two places:
The inside (inflammation) and the outside (too much to do).
Sipping this brew can help ease both. The anti-inflammatory herbs turmeric and ginger offer a tangy, slightly sweet flavor that will hit the spot. Lemon balm has been found to have antimicrobial,
antioxidant, and anti-anxiety properties.

Ingredients Needed…

raw honey lemon

– Peel and juice of 1 lemon
1 2-inch piece fresh ginger, peeled and grated or chopped
– 1/4 tsp ground turmeric or fresh root peeled and grated/chopped
– 1 tbsp of dried or fresh rose hips.
Hint: Picking wild rose hips after the first frost turns them soft and pre-ferments them with wild yeast.
– 2 tsp RAW honey or to taste
– 2 drops food-grade lemon-balm extract (also called Melissa) or fresh herbal leaf
– 1 sprig rosemary and/or thyme, optional

This is a small batch mix so increase the ratios if a larger batch is desired.

lemon raw honey

Directions…
– Start by fermenting the peeled ginger root, turmeric, rose hips, and RAW honey.
– Allow this to set and ferment for 3 to 4 days until bubbles are forming on top of the solution.
– Once fermented add the lemon juice/peel and lemon-balm extract. If there is not an extract available, one can be made by making a lemon-balm tea decoction.
– Once all ingredients combined cover and place into refrigerator for use during the winter months.

Use by the spoonful or add to a hot green tea for relief from colds during the winter months.

Enjoy these great wintertime  tonics to combat the cold and flu season.  See more ideas and post on our main Blog page.

For culturing starters, like kefir, koji spores, or Kombucha and fermentation supplies visit our Organic-Cultures online store.

Live, Grow, and Share Cultured Foods…Happy culturing!

Punjabi-Style Cabbage with Spices

Fermented – Vegan


punjabi style cabbage
This Punjabi-Style Cabbage is an easy cabbage recipe that infuses your meal with the flavors of Punjab, a region in India. It can be made in the slow cooker, but when sauteed on the stove top it only takes about five minutes to throw together! Most Indian food recipes require a lot of preparation, but not this one – with a few spices such as turmeric and cumin, plain cabbage is transformed into an exotic new dish. Recipes with turmeric are also beneficial for your health, as turmeric is an amazing spice that helps prevent a number of ailments.
If you’ve never tried Punjabi food, this is a great starting point!

One of the first times I made this dish everyone went crazy stuffing it in a roti like a taco. This is a delicious, easy recipe that will make cooking dinner fun. The dish is traditionally made on the stove top.

Ingredients Needed…

  • 3 tablespoons (45 ml) olive oil
  • 1 tablespoon cumin seeds
  • 1 teaspoon turmeric powder (see Notes)
  • ½ yellow or red onion, peeled and diced (½ cup/75 g)
  • 1 (1 inch/2.5-cm) piece ginger root, peeled and grated or minced
  • 6 cloves garlic, peeled and minced
  • 1 medium potato, peeled and diced (1 cup /150 g)
  • 1 medium head white cabbage, outer leaves removed and finely shredded (about 8 cups/560 g)
  • 1 cup (145 g) peas, fresh or frozen
  • 1 green Thai, Serrano, or cayenne chili, stem removed, chopped
  • 1 teaspoon ground coriander
  • 1 teaspoon ground cumin
  • 1 teaspoon ground black pepper
  • ½ teaspoon red chili powder or cayenne
  • 1½ teaspoons sea salt

punjabi style cabbage
Directions…

– First we will start by fermenting the cabbage.  Just like making kraut, start by preparing the cabbage and adding salt to make a 2% brine.  Allow to set at room temperature for a day to 3 days, or until bubbles start to form.  You can use already made kimchi or sauerkraut if you like.
– In a deep, heavy pan, heat the oil over medium-high heat.  Add the cumin, coriander, black pepper corns, and turmeric and cook until the seeds sizzle, about 30 seconds.
– Add the onion, ginger root, and garlic and cook for 2 minutes, stirring occasionally to prevent sticking.
– Add the potato. Cook for 2 minutes, until soft.
– Add the peas, chili, and red chili powder, and salt.

– Turn the heat to low and partially cover the pan.  Cook 8 to 10 minutes, some like to cook it a little longer.  Allow to cool to room temperature, then add the cabbage to maintain the fermented probiotics.

– Add the cabbage making sure all of the cabbage is mixed well with the spices and other ingredients.

Serve over rice, in a roti, or with naan bread.

Enjoy!