Tag Archives: recipe

~ Using Malted Rice Koji: Shio Koji, Dry-Aging, & Amasake ~

As fermented and cultured foods are becoming more popular …being served more in Western restaurants, on store shelves, and home pantries. But one that might not be very familiar is koji rice.
Mainly because it’s a fermented food that’s hiding inside another fermented food.
Today, we will introduce some different ways to use koji rice in recipes and dishes:

Shio Koji or Koji Salt
– Mock Dry Rub Steak
– Amasake Rice Beverage

cultured rice

Koji rice is steamed rice that has been inoculated with Aspergillus oryzae, a mold that ’s widespread in Japan. The mold releases enzymes that ferment the rice by decomposing its carbohydrates and proteins. This process can also be applied to other
grains like barley or soybeans.

To make koji rice, the mold culture Aspergillus Oryzae is added to the cooked sushi rice. The rice kernels are then placed in wooden trays and left to ferment in a warm, humid environment
for up to 50 hours.
The result is essentially molded rice, but don’t be put off by it immediately. What makes koji so special is that it digests starches and proteins and breaks them down into sugars and amino acids. The taste of the finished malted rice is sweet. Because of this, it can be used as a starter for a number of fermented Japanese food products, including amasake, mirin, sake,
shoyu soy sauce, and miso.

koji making

Shio Koji (塩麹, 塩糀) – A century-old natural seasoning used in Japanese cooking to marinate, tenderize, and enhance umami flavor of a dish.
It’s made of just a few simple ingredients: salt, water, and rice koji.
You can use shio koji to marinade meats, make pickles, flavor your vegetables or use it as a salt substitute.  In a recipe that calls for one teaspoon of salt, you can substitute with 2 teaspoons of shio-koji.  Shio-koji is really versatile and can be used in any kind of cooking.

mixing shio

~ Benefits of Shio Koji ~

Because it is a fermented ingredient, shio koji is known for its many health benefits, which includes:

  • A natural pro-biotic seasoning
  • Tenderizes food
  • Brings out the umami and sweetness in foods
  • Reduces the intake of salt
  • Aids in digestion
  • Clear the skin
  • Anti-aging
  • Contains minerals, fiber and vitamins

Shio Koji Recipe

What is needed to get started…
– 375g fresh koji rice
– 110g sea salt, 30% of the weight of the koji
– 560ml good quality water

First, wash your hands and sanitize a glass or metal container. Then rub the koji rice and salt between the hands mixing thoroughly.
Add the water to the shio and stir.

shio koji

Cover and keep in a warm place around 27 to 37 Deg C. Stir twice a day for 1 to 2 weeks. The amount of time can vary with the summer or winter temperature.

Now you can use the shio koji rice in many Japanese style dishes. You can marinade meats, make pickles, or just use your shio-koji as a salt substitute. Shio-koji is incredibly versatile and can be used in any kind of cooking. It will keep in the refrigerator for a good amount of time remembering to label & date. – Fin

~ Mock Dry-Aged Shio Koji Steak ~

Here’s a quick way of dry aging a steak without the time or higher prices for real dry aged. This method seems to be taking storm in the USA.

Dry-aged meat is amazing and certainly worth buying when you can afford it. However, a “mock” dry aging that tastes just as good as dry-aged meat, for a considerably smaller price tag and shorter time frame.

mock dry aged steak
steak rice

What is Needed…
– Steak, any cut desired, cheaper cuts seem to be a better deal.
– Koji rice, enough to cover the steak, purchase here or make your own koji rice.
– Time of about 2 to 3 days

Start by prepping and trimming the steak, if needed. The koji rice can be ground up into a powder or left as whole grains. Rub all sides of the meat (Use cheaper steak cuts for best results) generously and then let it sit uncovered on a wire rack in the fridge for 2-3 days. Don’t allow to sit too long or the meat starts to get too tough and begins to almost cure. After 12 hours, the meat starts to look like a moist, snow-covered slab of steak. The aroma is just as rich and nutty with a touch of sweetness, just as a steak that’s been dry-aging for over a month.

dry-aged steak

Before cooking, rinse the meat thoroughly in cold water to remove all the koji, then pat dry. Next, season the meat with salt and sear it in a cast-iron pan or cook normally. The dry-aged rubbed steak will caramelize and pick up color much faster than a normal steak. – Fin

~ Sweet Amasake Rice Beverage ~

Used in Japan as a sweetener, beverage, or a simple alcoholic drink. Amazake is one of the best known cultured and fermented items from Japan. There are several recipes for amazake that have been used for hundreds of years. By a popular recipe, kōji is added to cooled whole grain rice causing enzymes to break down the carbohydrates into simpler unrefined sugars. As the mixture incubates, sweetness develops naturally. By another popular recipe, sake kasu is simply mixed with water, but usually, sugar is added.
In this recipe, amazake becomes low-alcohol beverage if given time.

amasake beverage

Amazake can be used as a dessert snack, natural sweetening agent, food for infants, added in salad dressing or smoothies. The traditional drink (prepared by combining amazake and water, heated to a simmer, and often topped with a pinch of finely grated ginger) was popular with street vendors. It is still served at inns, tea houses, and at festivals.
Many Shinto shrines in Japan provide or sell it during the New Year!

Malted rice amasake

What is Needed…
– 3c cooked brown rice
– 1c of malted koji rice. If koji rice is needed…order here

Yield: 4 cups of fermented rice to use as a sweetener or 3 quarts Amazaké drink

Incubation Temperature: 120-140 F (50-60C)

doburoku

Start by cooking the brown rice and allowing it to cool to at least 120 F (50C). Once cooled, stir in the koji rice and mix well. Place mixture into a glass or stainless steel container that will allow an inch of “headroom” to allow for expansion during the fermentation process. Cover container and incubate, stirring every couple of hours to prevent heat buildup. The finished product can take as little as 6 hours with quality, fresh (not dried) koji-kin at optimum temperatures after 6 hours start tasting the ferment to see if the cycle is complete.

When finished the ferment should thicken like porridge with a mild sweet taste. The sweetness will increase up to a point after which it will change and start to become sour. Once the taste is to your liking, place into a saucepan and bring to a boil. Reduce the heat and simmer for 3 to 5 min., stirring frequently. Boiling will stop the fermentation process keeping the amazaké sweet. For a smother amazaké consistency purée the mixture in a blender until smooth. Refrigerate any ferment not used right away. If not, the amazaké will become very sour. A little fresh ground ginger may also be added.

Use the finished product to make a non-sugar sweetener, a beverage, even a simple grog called, Doburoku ( どぶろく or 濁酒 ).
– Fin

We hope you have enjoyed finding new ways of using fermented and cultured foods. See our store for more items like rice koji, spores, and accessories. Store.Organic-Cultures.Com

~ Wild Yeast Fermentations ~

  This post will cover fermentation with wild yeast and bacteria.  Before the isolation of yeast strains by traditional peoples the use of wild yeast was the only way to prolong food stores.  However, other methods were used, too, like drying and salting of meats and fish or seeds and grains.
Later, through the years, each culture of indigenous peoples saved certain culture strains for continued use until today. These included yogurt bacteria, molds used for tempeh and koji, and bacteria/yeast used for water kefir and kombucha.
grape water kefir

Basically, what yeast does is convert sugar into alcohol and carbon dioxide gas (CO2).  In fact, if you take a look at the origin of the word yeast, you’ll discover that it comes from the Old English gist and Old High German jesen or gesen, which mean “to ferment.”  You may not realize it, but wild yeast spores are present everywhere. They’re in the air we breathe; in plants, flowers, fruits, and soil.  With continued experimentation with fermenting and brewing, one will keep finding more and more sources of wild yeast.

Those who wild craft for food stocks know how potent the wild yeasts are in nature.  One of the better-known foods that carry wild yeast is berries.  Blackberries and raspberries placed in a sugar liquid produced a nice effervescent beverage that can be taken home or used right in the field the next day when camping or hiking.  Black elderberries, whether fresh or naturally dried, also produces a nice fizzy elixir when made in the same manner.
Another well know fruiting body that carries beneficial bacteria are vineyard grapes or wild ones. This is seen as a white residue on the outside of the grapes.
grape yeast
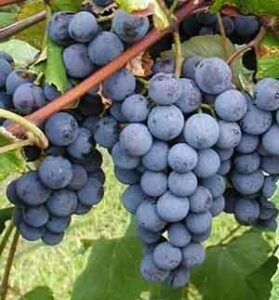
Rose hips harvested after the first frost also contains wild yeast and/or bacteria.  Any type of wild edible berry will contain the yeast and bacteria needed for making fermented beverages.

~ Good Sources of Wild Yeasts ~

rose hips elderberries– Organic grapes, plums, fruits that have a white bloom.
– Elderberries
– Wild Grapes
– Elderflowers
– Blueberries
blackberries– Blackberries/Raspberries
– Fresh or Dried Figs
– Prickly pear fruits
– Tree barks—birch (
Betula spp.) and aspen (Populus spp.).
– Unripe pine cones. My pinyon pine cones were loaded with yeast, and many people have reported excellent results using unripe pine cones from their local pines.
– Pinyon pine or white pine branches.
– Raw local honey
– 
A lot of unwashed organic fruits (apples, peaches, lemons, etc.) are also excellent sources of yeast. Make sure they’re organic and clean.

~ Other Items That Contain Beneficial
Wild Yeast ~

bee pollenThere are other items found in nature that allows for fermentation.  Pollen from flowers contains wild yeast, so many are used for culturing pro-biotic drinks.  Massive amounts of yeast are within the bee pollen from the array of flowers that the bees have collected.
Pollen extracts are sometimes used to help desensitize plants to which they are allergic.  In addition, melbrosia, a mixture of fermented bee pollen, flower pollen and royal jelly, may treat menopausal symptoms in women, including headaches and urinary incontinence.
Pollen contains many nutrients(enzymes and high-quality proteins).  However, due to the external structure of the cell wall, it is hard for humans to digest and use these nutrients. Adding the pollen to milk kefir or water kefir grains allows the cell wall to break down.

Here are a couple of recipes for using bee pollen for a healthy probiotic beverage:

fermented pollenSuper – Pollen – D’Probiotica

For Dairy Kefir:
– Add 1 tbsp of fresh bee pollen to 1 cup strained kefir. Ferment in a glass jar with the lids cracked slightly or use an air-lock to vent.  Ripen at room temperature for 1 to 3 days day tell fermentation starts or to one’s liking.
For Water Kefir:
– Add 1 tbsp bee pollen to 2 cups finished water kefir liquid.
Ferment for 48 hours or to taste.

bee with pollenThe Butterfly

A great fruity beverage to use some milk kefir.
– 2/3 cup of dark grape juice
– 1/3 cup fresh milk kefir(grains removed)
– 1 tbsp of fresh pollen
– A slice of lemon or orange, with peel
– Sprinkle of cinnamon

Start with the grape juice and add the pollen.   Now add the dairy kefir, swirl a bit with a straw or chopstick to marble the beverage.  Allow this to set for a few hours to incorporate and break down the bee pollen.

bee kaurtWild Nettle or Dandelion, Raw Bee Pollen, & Raw Honey Kraut

Here a great recipe to make sauerkraut using wild crafted ingredients:
– To begin you will need a 1/2 gallon-sized ball jar, 1 medium cabbage, fresh nettle or dandelion leaves, local raw honey, raw bee pollen, and some sea salt.
– Now core and shred the cabbage, salt it to taste then spread on a tray or large bowl.  Use as much salt to taste, common is 2 to 3 % salt brine.  Allow this to sit for an hour for the salt to start breaking down the cabbage.
– Pound the cabbage with a wooden hammer (or a rolling pin can work) until the juices start to release and the cabbage softens.
– Mix with bee pollen, drizzle honey and sprinkle in cleaned and greens, with steams removed.  Add these ingredients to one’s liking.
– Place in a wide mouth ball jar and press down with your fist (you can use a cabbage leaf as a top barrier and then press on that) until the veg is submerged in liquid. If there is not enough liquid to start, check it in a few hours as the cabbage breaks down more.
– Cover and leave at room temp for about 5-10 days.  Check on the sauerkraut and keep pressing it down below the liquid and release the gas occasionally as it starts to ferment.  The kraut should taste tart yet sweet from the honey when it’s ready…  if stronger sauerkraut is desired leave it at room temperature. When you are satisfied with the taste, transfer to cold storage where it will last for up to 12 months.

  There are many ways to collect and use wild yeast from nature.  Unlike standard yeast used for yogurts or miso wild yeast can vary in strength and potency.  This can affect the results of the finished beverage, however, most will turn out with high rates of effervesce.  Try using other flowers and fruits or even leaves from edible wildcrafted plants.
– Fin


KimChi Slaw w/ Cilantro & Lime Recipe #5

kimchi w red cabbage ~ KimChi Slaw w/ Cilantro & Lime Recipe 5 ~
Raw – Vegan – Fermented

This recipe uses an already made kimchi to make into a quick slaw.  It’s great for those who like kimchi but can’t handle the heat or for those who have not had kimchi before.  It combines the bold flavors of kimchi with cilantro, lime, and mild heat.  The slaw is versatile as a side salad/condiment for barbecue, with fried chicken, or even a hot dog topping.
Mix with shredded chicken for a quick main entree.
Use a neutral oil to have the dressing to coat the slaw.

Preparation time – 10 minutes – Makes 4 servings


Ingredients Needed…

red caabbage
– 4 cups shredded red or green cabbage, or a mix
– 1 ½ cups Daikon Radish Cube Kimchi
– 4 green onions, thinly sliced diagonally
–  A bit of grated carrot for color
– ¼ cup chopped cilantro
– Juice of ½ lime
– ¼ cup kimchi juice
– 1 tbsp of natural oil, optional
– 4 tbsp of fresh shiso leaf, optional

red cabbage % cilantro
Directions…

– Mix the cabbage, kimchi, green onions, cilantro/shiso in a large bowl
– In a separate bowl, whisk together the lime and kimchi juice. Then slowly mix in the oil until incorporated.
– Now pour the dressing over the cabbage mixture and toss to coat. Serve immediately or cover and refrigerate a few hours to allow the flavors to meld.

red cabbage kim chi
Enjoy this quick and easy kimchi slaw to add flavor to an entree, snack, or as a side condiment.
See more recipes and join our Blog page –
blog.organic-cultures.com

How to Make Natto…Natto Kin Spores

natto kin


What is Natto?
Nattō (なっとう or 納豆?) is a traditional Japanese food made from soybeans fermented with Bacillus subtilis var. natto. Some eat it as a breakfast food. Nattō may be an acquired taste because of its powerful smell, strong flavor, and slimy texture. In Japan, nattō is most popular in the eastern regions, including Kantō, Tōhoku, and Hokkaido.

Before Making NATTO:

  • Be sure the entire processing area is cleaned for production. Make sure all utensils, pots, cheesecloth (FUKIN), etc. are as sterile as possible. (Boil utensils for 5 minutes prior to using.)
  • The packet of NATTO spores comes with a special small spoon; be sure to use the small spoon to measure the appropriate quantity for the recipe.
  • The fermentation process requires the NATTO be kept at approximately 100°F (37°C) degrees for 24 hours. Ovens with a low temperature setting can be used, an oven w/ light on only, or inoculate in large cube-shaped food dehydrators.
  • NATTO is quite odorous while fermenting, and you may want to isolate the fermenting NATTO during this time.

Ingredients and Supplies needed for Making NATTO:

  • 2 pounds (900g) soybeans (about 4 cups)
  • 10cc water, boiled for 5 to 10 minutes to sterilize
  • One spoonful (0.1 g.) NATTO-kin spores (use the special spoon that came with the packet)
  • Cheesecloth or butter muslin (FUKIN in Japanese)
  • Non-reactive pot (i.e., stainless steel, enameled, ceramics, etc.) or Pressure cooker
  • Large stainless steel, wood, or plastic spoon or spatula
  • 3-4 oven-proof glass containers with lids

Instructions for Making NATTO:

– Wash the soybeans using running water to gets rid of tiny dirt or dead skins off the beans.

Washing soy bean
Washing the Soaked Soy Beans

– Soak with clean water for 9 to 12 hours (longer soaking time recommended during colder months). Be sure to use approximately 3 parts water and 1 part soybeans to allow for expansion. You will end up with 8 to 12 cups of beans.

drained soy beans
Draining Soy Bean for Steaming/Boiling

Drain the beans from the soaking water. Place beans in a large pot with mesh bowl and pour in water. Steam it for 3-4 hours. Or fill with water and boil 5-6 hours. The recommended way is to use a “Pressure cooker”, that can be cooked faster than in a normal pot. Please refer to the pressure cooker instruction manual for operation guidelines.

cooked soy beans
Steaming Soy Beans for Natto-Kin

– Drain the cooked beans and place in a sterilized pot.  Dissolve 1/5 special spoonful of NATTO spores (0.1g) into 10cc of sterilized water (or mix by package directions).

natto spores bulk

japan natto
Types of Natto Spores From Japan

– Immediately pour the NATTO spore solution over the beans while the beans are still warm but not hot to the touch. Stir the beans and water mixture together carefully using a sterilized spoon/spatula.

inoculation of spores
Inoculation With Natto Spores

– Place a thin layer of beans in each of the 3 to 4 containers. If at any point during the process some beans are spilled on the counter, etc., discard the spilled beans as they can contaminate the other beans if added back in to the batch.

package inoculated beans
Natto Being Packed into Serving Trays

Place the sterilized cheese cloth over the top of the containers and place the tight-fitting lid over the cheese cloth. Preheat the oven, dehydrator, or KOTATSU Japanese Warmer to 100°F (37°C). Place the covered containers in the oven, dehydrator, or warmer and allow the NATTO to ferment for 24 hours being sure to keep the temperature steady at 100°F (37°C). Check the temperature throughout the day/night.

inoculation
Inoculation Time !

At the conclusion of the fermentation period, let the NATTO cool for a couple of hours, then remove the lid and the cloth, replace the lid, and store the containers in the refrigerator at least overnight.

NATTO can also be aged in the refrigerator for 3-4 days. Smaller portions of finished NATTO can be stored in the freezer and thawed for later use.

natto dish
Ready to Eat…YUM!

Need Natto spores fresh from Japan?  We have them in our store with many other types of food culturing spores:

Japanese Natto Spores
More Food Spores

Happy Culturing!


To Error is Human…

Making cultured foods and beverages are not hard if one follows some basic rules, common sense, and of course safety factors. Our ancestors have been doing this all around the world for a 1000 years or more. Wild fermentation can produce some great ferments, however, the results can very from batch to batch depending on the types of wild yeast and bacteria
within the food stock.
fermented chili peppersHaving a traditional starter culture ensures the same results each time. An example is making beer with wild yeast vs. using a brewers yeast. The outcome could be close in taste and flavor to each other or very different, with the wild yeast sometimes making the beer unpalatable. Having a tried and true recipe helps to make sure the results are the same every time, too. Checking acidic levels and having the correct microorganisms, like lactobacillales, ensure cultured food safety.
Especially in wild fermentation.

Now For the Errors…

Being busy here in the lab sometimes it is easy to forget a step in a recipe or process (Why to double check and taste things). A resent example that I have done was when making a batch of ginger beer/brew. I have made this recipe so many times I don’t even refer to it anymore. Well being in a rush one day had all the steps completed…water heated, sugar dissolved, lemon added for a small batch of brew. Waiting for temperature to decrease to room temperature and then on to bottling. Batch was then bottled
and set out for 3 days for the ginger culture to
produce a fizzy beverage.

ginger beer starter
Old time ginger brew beer in clay bottle

After the waiting period is was time to try it out. A nice chilled ginger brew on a long hot day…yeah! The bottle is opened and to my surprise, no fizz. Then tasting it I knew what had went wrong…no ginger starter culture was added before bottling. No flavor and no fizz, just lemon sugar water. At that point nothing to do but uncap them all, dump it, and start over.

The lesson here is to taste and follow a recipe to get the results one wants. Don’t try to get to crazy with flavors and adding to many things at a time. A great example is people adding to much fruit or juice when bottling kombucha tea or water kefir and then wondering why the bottles explode all over. Another example is trying to make a crazy kimchi blend and it turning out ‘wrong’ or not having a good flavor. Hard to tell what went wrong with to many factors vs adding one or two things to the mix and waiting for the outcome. I hope this short post will help everyone to become a better fermenter and produce
great tasting fermented and cultured foods.
There are many tried and true recipes on our sister site here.
Happy Culturing!

Cashew Rice with Peas – Meatless Mondays #10

This is a simple and easy to make recipe for lunch or dinner.

Start by steaming rice, Basmati rice is traditional rice from India. Basmati is imported from the east and available at all Indian grocery stores and many health food stores. Substitute with white or brown rice if needed, however, basmati rice is extra special in that it is nutritious and has very good flavor.
cashew rice

What is Needed:

– 2 to 3 cups steamed basmati rice
– ½ cup roasted cashew pieces
– ½ cup of peas
– 2 tablespoons ghee or clarified butter,
olive/coconut oil for vegan
– Pinch of turmeric powder
– Pinch of hing (a spice used in many Indian dishes)
– ½ teaspoon sea salt or to taste
– Fresh tomatoes diced, for garnish
– Freshly chopped coriander leaves or dry spice

Once the rice is steamed, the dish is ready to assemble…

Add the ghee to a clean pot, and then add the steamed rice.
Add turmeric, hing, coriander, and salt. Stir ingredients together until well mixed, making sure not to crush/over work the rice.
Add cashews and peas, blend into rice mixture and heat through.

Garnish with the tomatoes and more coriander.
Serve with chapatis or flat bread if desired.

Hint: Replace the ghee with extra virgin olive oil or coconut to make a vegan dish.  Serves 4

Raw Fermented Traditional Gazpacho

Raw Fermented Traditional Gazpacho

Fermented Gazpacho
Fermented Gazpacho Garnished with Rosemary

For us here in the land of culture, we always look for ways to enhance dishes by adding a healthy dash of pro-biotics and natural umami flavors (a savory taste)
One taste of this chilled gazpacho instantly transports you to a land of whitewashed walls, red-tiled roofs, and the golden sun…of Spain. Try this twist on a traditional recipe that is great for a cool thirst-quenching summer drink!

Makes 4 servings

Ingredients Needed:

• 10 oz of old or dried white or wheat bread
• 2 lbs of fresh tomatoes, chopped, save some for a garnish
• 2 cloves of garlic
• 2 white onions diced
• 2 red or green peppers, chopped
• 1 cucumber (optional)
• 7 tablespoons of oil
• 2 tablespoons of red wine vinegar
• 1 1/2 tablespoon of very cold water
• Salt to taste
• Cumin (optional)
• Small amount of raw miso paste for a stronger taste (optional)

To make this traditional recipe fermented, premix the tomatoes, onions, and a few tablespoons of liquid from a culture of either a ginger brew/bug or a water kefir starter. Ferment for a day or two until fermentation starts. For extra pro-biotics, soak the bread over night in some water to make a Kvass type ferment (Find recipes online). When you are ready to make the gazpacho, squeeze the moisture out of the bread.
1. In a mortar, grind the cumin, garlic, miso paste, and the soaked bread.  Tip: If using the miso paste the amount of salt is reduced.
2. In another bowl, mix the chopped onions, the chopped tomato, olive oil, vinegar, salt and the contents of the mortar.
3. Place in a blender or mash it with the mortar and add very cold water to mix well.
Tip: Some like it thicker like a soup or add more cold water for a more drinkable fermented beverage.
4. Add more salt (if needed) and strain it. Keep it in the refrigerator until ready to serve.
Serve with the tomato, the cucumber, the pepper and toasted bread cut to dices.
We hope that you will enjoy this great summer time beverage…raw, pro-biotic, and refreshing! Happy Culturing!

What is Tempeh and Tempeh Starter?

What is Tempeh?

tempeh spore cake Tempeh is made from cooked and slightly fermented soybeans and formed into a cake, similar to a very firm veggie burger. Traditional tempeh is a soybean cake that has a rich smoky flavor and aroma, with a firm nutty texture. The soybeans are fermented and inoculated with the mold spores of Rhizopus oligosporus. Use the cooked TPS cakes as a replacement for meat in many recipes.

Tempeh works well for making tacos, hamburgers, and our favorite…the grilled Tempeh Reuben with raw sauerkraut! If you live in Indonesia, you can buy tempeh starter easily.  In the USA, buying the starter spores can be a bit difficult; however, to make tempeh is not too hard.  Many commercially prepared brands add other grains, such as barley, also adding spices and extra flavors.  All this you can do yourself at home by adjusting the recipe.  Although tempeh is a soy product, it has a unique taste and a mildly smoky flavor, unlike tofu.

Description

Making tempeh  Tempeh is fermented soy food that originated on the island of Java in Indonesia and is fermented with the mold
Rhizopus oligosporus. Fermentation of tempeh can involve a period of several days or longer, and fermentation is
usually carried out at temperatures of 85-90°F/29-32°C. Tempeh is usually purchased in a cake-like form and can be
sliced in a way that is similar to tofu. However, tempeh has a less watery texture than tofu, and in comparison to non-
fermented tofu, a more distinct flavor as well. Steaming, baking, and frying are all popular ways of preparing tempeh
in many countries. Tempeh is also commonly incorporated into stews, soups, and grilled kebabs.
To understand more about tempeh’s health benefits, it can be helpful to think not only about the fermentation of soybeans into tempeh but about the fermentation of foods in general.

How to Use Tempeh

Because it is a low-fat and high-protein food, many vegetarians choose to include tempeh in their diet on a regular basis. Try adding some to a stir fry instead of tofu, or crumble into soups or meatless chili for added bulk and protein.  Because of the tempeh cakes firm texture, the tempeh should be sliced into small dices, cubes, or slices as the recipe calls for.  Find tempeh in the refrigerated section of most health food stores and in the natural foods aisle of well-stocked grocery stores.  However, for the best and cheapest tempeh, one should make a fresh home-made tempeh product.

With a fresh tempeh cake, the finished product is cut and prepared for the entrée desired.  Cutting it into ¼” strips and marinating is great for sandwiches, tempeh bacon, or the feel of cut steak.  Dicing and marinating work well for stews, soups, and stir-fry dishes and recipes. Just like tofu, tempeh cakes will take on the flavor of the marinade.  The trick is two panfry or grill the prepared tempeh (tempeh should never be eaten raw) then wait until the last to add the tempeh to the entrée or recipe.  If added too soon, the flavor of the marinade will become lost to the dish.

A Few Quick Serving Ideas for Tempeh

  • For a twist on the traditional reuben sandwich, place broiled tempeh on a slice of whole grain bread, layer with sauerkraut, top with cheese or non-dairy “cheese” and then broil in oven for a few minutes until the sandwich is hot and toasty. Top with Russian dressing made by combining ketchup and mayonnaise, and enjoy.
  • A vegetarian option to spaghetti and meat sauce is spaghetti and tempeh sauce. Just substitute tempeh for ground beef in your favorite recipe.
  • Add extra flavor, texture, and nutrition to chili by adding some tempeh
  • Check out our site for some of the best recipes including…Tempeh Reuben sandwich w/ raw sauerkraut

Making Tempeh From Spores

tempeh in banana leafMaking tempeh is not a hard process for those with some cooking skills or background. The basics are boiling and de-hauling the soybeans, letting this cooldown, and inoculate the cooked soybeans with the tempeh spores. The finished result is a firm white cake ready to slice and cook.
The detailed instructions are at our main website https://organic-cultures.com/tempeh instructions

Tempeh soy cakes are a traditional Indonesian food made by fermenting soybeans with a starter culture.  Traditional tempeh is a soybean cake that has a rich smoky flavor and aroma, with a firm nutty texture.  Tempeh or TPS is one of the Indonesian traditional foods full of protein made by fermenting soybeans with the Rhizopus mold spores.  It is high in nutritional value, providing nutrients such as protein, riboflavin, magnesium, phosphorus, copper, and manganese.  It is also low in Cholesterol and Sodium. If you live in Indonesia, you can buy tempeh starter easily.  In the USA, buying the starter spores can be a bit difficult; however, to make tempeh is not too hard.  A meatless choice is great for vegans or those looking for a healthy probiotic alternative for an animal-based diet.  Cooks up like ‘bacon or steak’ when sliced thin and fried.  It is recommended not to eat tempeh products raw. Soy should only be consumed after fermentation and not raw.  The ragi tempeh spores will break down the soy into an easy to consume food.

Want to know more about tempeh – PTS? Checkout our Main Site.
Need tempeh starter spores – Visit our store

Happy Culturing!  Live, Grow, Share Cultured Foods

Kombucha Tip For the Week 10/16/2013

kombucha tea cultureKombucha Tip For the Week… As requested again… Kombucha Tea Fast Brew Method V02:
Our fast brew method can save a bit of time and the tea/sugar solution is ready to inoculate with the kombucha cultures and start tea.
KT Classic Recipe… is as follows: – 1 gallon water, bring to boil – Add 6 teabags or teaspoons per gallon – Add 1 to 1½ cups of sugar, stir – Allow to cool to room temperature and inoculate with culture – Brew 7 to 14 days
KT Fast Brew Method: – ½ gallon of water, bring to boil – Add 6 teabags or teaspoons per gallon – Add 1 to 1½ cups of sugar, stir to dissolve – Add ½ gallon of cold water, mix – Allow to cool to room temperature and inoculate with culture – Brew 7 to 14 days   The difference is that the fast brew method will require less time to cool the raw tea/sugar solution, thus, getting the round brewing faster. The basic difference is cutting the water in your recipe by half and then adding the other half of the water (cold) at the very end. This cools the solution faster, to get the batch started and help to prevent mold.
Happy Brewing, Nirinjan Singh

Kombucha Tip For the Week… & Culture Question of the Week…

Kombucha Tea Tip for the Week…

Kombucha tea fast brew method… Our fast brew method can save a bit of time and the tea/sugar solution is ready to inoculate with the kombucha cultures and start tea.

KT classic recipe is as follows:
– 1 gallon water, bring to boil

– Add 6 teabags or teaspoons per gallon

– Add 1 to 1½ cups of sugar, stir to dissolve

– Allow to cool to room temperature and inoculate with culture

– Brew 7 to 14 days

Kombucha Tea Culture Fast Brew Method:
– ½ gallon of water, bring to boil

– Add 6 teabags or teaspoons per gallon

– Add 1 to 1½ cups of sugar, stir to dissolve

– Add ½ gallon of cold water, mix

– Allow to cool to room temperature and inoculate with culture

– Brew 7 to 14 days

The difference is that the fast brew method will require less time to cool the raw solution, thus, getting the round brewing faster.  The basic difference is cutting the water in your recipe by half and then adding the other half of the water (cold) at the very end.

Question of the Week…

My Kombucha Culture is Producing a Flat Beverage, What Can I do to Make More Fizz?

This happens to many KT brewers from time to time. First of all, use best quality ingredients you can afford, we suggest organic ingredients. Are you using city water? Then stop!  Try changing the type of tea your using and use no teas high in oil content, like peppermint or Earl Grey.
Some people will tell you to just add more sugar, however, just as in beer and saké making, adding to much sugar can make the yeast even more sluggish.
I believe temperature plays a bigger role in producing fizz in the KT, which is the carbon dioxide (CO2), produced from the yeast breaking down the sugars.  My suggestion is to make sure the temp (of the liquid, not the ambient temp) is at least 80 deg F for the first 3 or 4 days, then drop the temp down to 70-75 Deg F for the rest of the brewing cycle.  If you feel that you need more sugar then add it by ‘addition’ over the first 3 days of brewing.
Another trick is to make sure the raw tea/sugar solution is aerated. Do this by pouring the cooled tea between two vessels several times. One last tip, the SCOBY culture helps to trap in the CO2 so make sure your culture doesn’t have a lot of holes in it and that the new culture forms and seals the top of the liquid.

Hope this helps, Happy Brewin’, Nirinjan Singh