Category Archives: Culturing Recipes

Recipes for using cultured and fermented foods. Check each week for new ideas on using your cultured foods and stock.

~ Wild Yeast Fermentations ~


This post will cover fermentation with wild yeast and bacteria.  Before the isolation of yeast strains by traditional peoples the use of wild yeast was the only way to prolong food stores.  However, other methods were used, too, like drying and salting of meats and fish or seeds and grains.
Later, through the years, each culture of indigenous peoples saved certain culture strains for continued use until today. These included yogurt bacteria, molds used for tempeh and koji, and bacteria/yeast used for water kefir and kombucha.
grape water kefir

Basically, what yeast does is convert sugar into alcohol and carbon dioxide gas (CO2).  In fact, if you take a look at the origin of the word yeast, you’ll discover that it comes from the Old English gist and Old High German jesen or gesen, which mean “to ferment.”  You may not realize it, but wild yeast spores are present everywhere. They’re in the air we breathe; in plants, flowers, fruits, and soil.  With continued experimentation with fermenting and brewing, one will keep finding more and more sources of wild yeast.

Those who wild craft for food stocks know how potent the wild yeasts are in nature.  One of the better known foods that carry wild yeast are berries.  Blackberries and raspberries placed in a sugar liquid produced a nice effervescent beverage that can be taken home or used right in the field the next day when camping or hiking.  Black elderberries, whether fresh or naturally dried, also produces a nice fizzy elixir when made in the same manner.
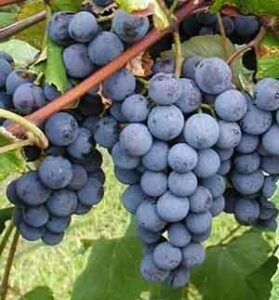
Another well know fruiting body that carries beneficial bacteria are vineyard grapes or wild ones. This is seen as a white residue on the outside of the grapes.
grape yeastRose hips harvested after the first frost also contains wild yeast and/or bacteria.  Any type of wild edible berry will contain the yeast and bacteria needed for making fermented beverages.

~ Good Sources of Wild Yeasts ~

rose hips elderberries– Organic grapes, plums, fruits that have a white bloom.
– Elderberries
– Wild grapes
– Elder flowers
– Blueberries
blackberries– Blackberries/Raspberries
– Fresh or Dried Figs
– Prickly pear fruits
– Tree barks—birch (
Betula spp.) and aspen (Populus spp.).
– Unripe pine cones. My pinyon pine cones were loaded with yeast, and many people have reported excellent results using unripe pine cones from their local pines.
– Pinyon pine or white pine branches.
– Raw local honey
– 
A lot of unwashed organic fruits (apples, peaches, lemons, etc.) are also excellent sources of yeast. Make sure they’re organic and clean.

~ Other Items That Contain Beneficial
Wild Yeast ~

bee pollen
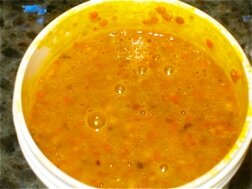
There are other items found in nature that allows for fermentation.  Pollen from flowers contain wild yeast, so many are used for culturing pro-biotic drinks.  Massive amounts of yeast are within the bee pollen from the array of flowers that the bees have collected.
Pollen extracts are sometimes used to help desensitize plants to which they are allergic.  In addition, melbrosia, a mixture of fermented bee pollen, flower pollen and royal jelly, may treat menopausal symptoms in women, including headaches and urinary incontinence.
Pollen contains many nutrients(enzymes and high quality proteins).  However, due to the external structure of the cell wall it is hard for humans to digest and use these nutrients. Adding the pollen to milk kefir or water kefir grains allows the cell wall to break down.

Here are a couple recipes for using bee pollen for a healthy pro-biotic beverage:

fermented pollenSuper – Pollen – D’Probiotica

For Dairy Kefir:
– Add 1 tbsp of fresh bee pollen to 1 cup strained kefir. Ferment in a glass jar with the lids cracked slightly or use an air-lock to vent.  Ripen at room temperature for 1 to 3 days day tell fermentation starts or to one’s liking.
For Water Kefir:
– Add 1 tbsp bee pollen to 2 cups finished water kefir liquid.
Ferment for 48 hours or to taste.
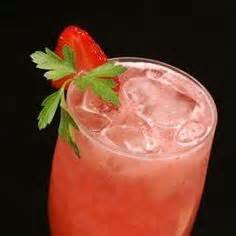
bee with pollenThe Butterfly

A great fruity beverage to use some milk kefir.
– 2/3 cup of dark grape juice
– 1/3 cup fresh milk kefir(grains removed)
– 1 tbsp of fresh pollen
– A slice of lemon or orange, with peel
– Sprinkle of cinnamon

Start with the grape juice and add the pollen.   Now add the dairy kefir, swirl a bit with a straw or chopstick to marble the beverage.  Allow to set for a few hours to incorporate and break down the bee pollen.

bee kaurtWild Nettle or Dandelion, Raw Bee Pollen, & Raw Honey Kraut

Here a great recipe to make sauerkraut using wildcrafted ingredients:
– To begin you will need a 1/2 gallon sized ball jar, 1 medium cabbage, fresh nettle or dandelion leaves, local raw honey, raw bee pollen, and some sea salt.
– Now core and shred the cabbage, salt it to taste then spread on a tray or large bowl.  Use as much salt to taste, common is 2 to 3 % salt brine.  Allow to sit for an hour for the salt to start breaking down the cabbage.
– Pound the cabbage with a wooden hammer (or a rolling pin can work) until the juices start to release and the cabbage softens.
– Mix with bee pollen, drizzle honey and sprinkle in cleaned and greens, with steams removed.  Add these ingredients to one’s liking.
– Place in a wide mouth ball jar and press down with your fist (you can use a cabbage leaf as a top barrier and then press on that) until the veg is submerged in liquid. If there is not enough liquid to start, check in a few hours as the cabbage breaks down more.
– Cover and leave at room temp for about 5-10 days.  Check on the sauerkraut and keep pressing it down below the liquid and release the gas occasionally as it starts to ferment.  The kraut should taste tart yet sweet from the honey when it’s ready…  if a stronger sauerkraut is desired leave it at room temperature. When you are satisfied with the taste, transfer to cold storage where it will last for up to 12 months.

  There are many ways to collect and use wild yeast from nature.  Unlike standard yeast used for yogurts or miso wild yeast can very in strength and potency.  This can affect the results of the finished beverage, however, most will turn out with high rates of effervesce.  Try using other flowers and fruits or even leaves from edible wild crafted plants.
– Fin


~ 3 Traditional Indian Lassi Recipes ~

~ Traditional Indian Lassi ~

mango Lassi
The famous Indian yogurt drink that is smooth, creamy, and absolutely heavenly! There are many variations of lassi, which is basically a blend of cultured diary kefir or yogurt mixed with fresh fruits and/or herbs. If the yogurt or kefir is ready made, this great refreshing drink can be made in minutes. The lassi drink can be used as a before meal appetite enhancer or after a meal as a dessert beverage.

Lassi is a popular traditional dahi (yogurt) based drink that originated in the Indian subcontinent. Lassi is a blend of yogurt, water, spices and sometimes fruit. Traditional lassi is a sweet savory drink, sometimes flavored with ground and roasted cumin. Salty lassi, however, contains salt and other spices, instead of sugar. It is important to use fresh yogurt/kefir that is not sour tasting.

Main Ingredients: Dahi (yogurt), fruits, cream, sugar, water, and spices

Mango Lassi

lassi mango
– 2 Ripe mangos, cut, seeded, and diced
– 2 cups of yogurt or milk kefir
– ¼ to ½ cup of jaggery (A raw India sugar) or cane sugar

Place all ingredients into a blender and pulse until blended.
Pour into glasses and serve. Garnish with a mango slice and a sprig of mint.

Mango – Mint Lassi

mint lassi
It’s a great take on the famous Mango Lassi that you tend to see at various Indian restaurants because it takes the flavor to a higher and much more complex level. This can also be done with only mint, if desired, just double the amount of mint leaves used.

– 1 Ripe mango
– 3 tbsp brown or jaggery sugar
– 2 tbsp chopped mint leaves
– 1 tsp ground star anise
– 1 tsp ground cardamom
– 1 tbsp lime juice
– 2 cups fresh yogurt or kefir
– whole mint leaves for garnish

Blend the mango, brown sugar/jaggery, chopped mint, star anise, cardamom, lime juice, and yogurt in a blender on high speed until smooth. Pour into glasses and garnish with fresh mint sprigs to serve.

Strawberry Mango Lassi

lassi strawberry
This is a fruity twist to the traditional lassi.

– 300 to 350 gr of strawberries, remove hulls and steams
– 1 to 1.5 cups of chilled yogurt
– 2 to 3 tbsp heavy cream
– 6 tbsp of sugar or raw honey
– 1 to 2 tsp rose water
– Sliced strawberries for garnish

Prepare the strawberries, mix with the honey or sugar, and blend until smooth.
Next, add the fresh yogurt and rose water, pulse until a smooth lassi is created.
Serve the strawberry lassi immediately. Garnish with a strawberry and/or mint leaf.

lassi yogurt  Lassi is a great way to use yogurt/kefir and a different way to use it over making smoothies. Above is three classic lassi blends, there are so many ways to make lassi with a favorite mix of fruits and spices.
Let the imagination go wild with flavor combination!
Enjoy!

For yogurt and milk kefir starters, visit our online store at: store.organic-cultures.com


~ Fermentationed Tonics for Winter Time & Immunity Building ~

RAW – Fermented – Vegan

Fermented Garlic in Honey – Ninniku Hachimitsu-zuke

garlic in raw honey

This is a great cultured ferment for the winter season!
Easy to make and loaded with cold and flu fighting properties.
We recommend using RAW honey for the best taste and beneficial remedies.  The honey is ready in as little as 2 to 3 days.  Wait around a month or more to eat the garlic cloves and to allow full fermentation.  The garlic will start to break down if left to sit to long, best to make smaller batches to use within a month
or two after fermenting.
The honey gives a nice sweet and strong garlic flavor
for many dishes.
Or if your a garlic fan you can eat the cloves, like candy.
The garlic infused honey, when thinned down with water, makes a great hot or cold drink to enjoy or as a cold remedy!
One can find many benefits to using this recipe for
health and well being.

What is Needed:
– 10 oz (300g) Fresh garlic
– 7 to 9 oz (200-250g) Raw Honey

Directions:
1.  Start by separating the cloves of garlic, trim off the roots and outer skin.  Make sure to remove the thin membrane under the outer skin.
2.  Wash and pat the garlic dry, being careful not the break or damage the cloves.  However, some will slightly break open the cloves to activate the allicin.  The results seem to be the same, but whole cloves seem to have a longer shelf life.
3.  Prepare a small packing jar by boiling in water to sterilize, also called a water bath.
4.  Pack the garlic cloves into the sterilized container.  Pour over the honey.  Allow the honey to set for a minute and top off, making sure to cover all the cloves.
5.  Cover with lid and allow to sit in a cool dark place.  Fermentation times very, after a couple of days one should see bubbles forming in the honey mixture or even a foam on top.
6.  For those who worry about botulism, you can also add a tsp of organic raw apple cider vinegar.  This only needs to be done if the pH is to high.  The mixture should read at 4.6 pH or lower, this should happen naturally.

After a months time, place in cold storage for better long term preservation.  Enjoy!


~ Elderberries in Raw Honey ~

elderberry honey

  Black elderberries have a rich history in herbal medicine and elderberry syrup is a must-have in any natural cold and flu medicine chest.  Elderberry syrup gained significant attention in the natural health community shortly after the H1N1 flu outbreak when a study was released demonstrating its ability to effectively inhibit this widespread strain of the flu (Roschek, et.al., 2009).  It be bought already prepared, however, it is very easy to make at home.

What’s the Proper Way to Make Elderberry Syrup?

It’s crucial that the elderberries are from a reputable source, that all excess twigs or unripe berries are removed, and that the berries are cooked sufficiently to eliminate the toxin that is found in the seeds.  Even when elderberries are dried before cooking and the syrup is strained, it is possible for this toxin to produce complications if the syrup is not cooked sufficiently.  Remember, the purpose of an extract is to extract the active constituents from the herbs; this includes toxins.

Ingredients Needed…
To make a proper batch of safe and effective elderberry syrup, you will need:
– 100 g dried elderberries
– 1 to 2 quarts cold distilled water
– 1 1/2 cup RAW honey
– Add other items such as fresh ginger root and/or cinnamon sticks

elder berry syrup

Directions…
–  Combine the berries and water in a large (cold) sauce pan. If time permits, allow the berries to soak until they are soft, about 30 – 60 minutes.
–  Place over medium heat and gradually bring to a boil. Once a rolling boil has been reached, reduce heat to a simmer and continue to cook for 30-45 minutes, stirring frequently.  You may have to add additional water to prevent burning the berries.
–  Do not cover the pot during this phase.  This process cannot be shortened as it is crucial for eliminating the cyanide-like toxin in the seeds.  Remove from heat and cool to room temperature.
–  Strain the concentrated extract and measure the liquid. It should be approximately 2 cups (If you have less than 2 cups, water can be added to reach 2 cups.  If you have more than two cups, continue boiling the mixture down.  It is crucial to have a 2-cup measurement at this state to ensure accurate dosing.  Combine with the cup and a half of honey.  Allow to cool slightly and pour into prepared bottles (which have been placed in a water bath.)
Allow to ferment a few days at room temperature, then store in the refrigerator.

Note: This can be a very active ferment.  Make sure to use an airlock or vent a couple times per day.  Even under refrigeration it will burp, due to the active wild yeast and RAW honey.

How Much Elderberry Syrup Can I Take?

The average dose used in studies to treat viral infections is 15ml of a syrup with 38% elderberry, 4x a day for adults and the same amount at a 19% concentration for children.  Commercial doses are often much less potent than those used in clinical studies.  For the equivalent of a single dose of a commercially prepared product, the formula provided above produces 35 total doses. (To determine dosing, measure the total amount of product you have and divide by 35.)

Note:  Keep in mind that the half-life of the active components in elderberry treatments is only a couple of hours total, so frequent dosing is required.  As a result, one dose per day will not be effective at either prevention or treatment.


~ Fire Cider Tonic ~

fire cider

  While most recipes for fire cider use a heavy hand with the garlic because of its potent medicinal properties, you should feel free to tweak and embrace the flexible nature of this recipe.  Fresh turmeric is a lovely substitute for dried – use about 3 tablespoons coarsely chopped or grated.  Also, one can use fresh chilies instead of dried hot chilies, use sliced fresh jalapeño or habanero, or even smoke-dried ones.  One benefit of using fresh is to impart more
wild yeast into the fermentation process.

Consider adding other citrus, such as grapefruit or blood oranges, in place of or in addition to the lemon.  Note: This tonic recipe needs to sit at room temperature and ferment for 1 month before enjoying.

fire cider tonic

Ingredients Needed…
This recipe makes around 2 cups of finished product. Fire cider tonic can be made 3 months ahead; store chilled in a (preferably glass) resealable container.

– 1 cup coarsely grated peeled horseradish (about 4 ounces)
– 1 small onion, coarsely chopped
– 8 large garlic cloves, smashed
– 1/2 cup peeled and coarsely grated or chopped ginger (about 3 ounces)
– 1 tablespoon ground turmeric
– 1 teaspoon black peppercorns
– 4 rosemary sprigs
– 1 whole clove
– 1 or 2 dried hot chilies or adjust to one’s liking
– 1 lemon, quartered/sliced or other acid type fruit
(This is a safety factor keeping the pH below the needed 4.6 pH)
– 2 cups (or more) unfiltered apple cider vinegar
– 2 tablespoons (or to taste) RAW honey

fire cider brew

Directions…
– Place horseradish, onion, garlic, ginger, turmeric, peppercorns, rosemary, and clove in quart jar.
– Crumble chilies into jar.
– Squeeze in lemon quarters; add rinds.
– Pour vinegar into jar until solids are fully submerged.
– Cover tightly, then swirl jar gently to combine.

Let stand in a dark spot 1 month.  After allotted time frame:

  1. Strain through a cheesecloth-lined colander or sieve into a large measuring cup; discard solids.  Gather up corners of cheesecloth to extract as much liquid as possible (wear gloves if you wish to avoid turmeric stains on your hands).  Rinse out jar and pour in liquid.  Add 2 Tbsp. honey, then shake covered jar or whisk to combine.  Add more honey to taste.
  2. You can transfer mixture to a few smaller bottles, such as swing-top bottles, as it’s easier to pour from this way.  Tightly seal and move into refrigerator for long term storage.

fire cider bottle

Ways to Use the Tonic…

Cold Preventative:
Sip by the spoonful when you feel a cold coming on. It can also diluted in water if taste is to strong.

Fire Cider Tea:
Add about 1 Tbsp. fire cider to a mug of hot water, along with a squeeze of fresh lemon juice and a little honey to sweeten. Finish with a bit of freshly ground black pepper.

Fire Cider Tonic:
This makes a great mocktail. Add about 1 Tbsp. fire cider and a squeeze of fresh orange juice to a glass of seltzer. Garnish with rosemary sprig.

Marinade:
Use on fish, chicken, or other dishes like tofu.
Think of fire cider as the acid in bright, assertive marinades similar to those for jerk chicken.


~ Golden Lemon Drop Honey Tonic ~

lemon honey

A great tonic for sore throats and the to combat on coming colds! This is an easy to make tonic that can be made in just a few days.
Stress can come from two places:
The inside (inflammation) and the outside (too much to do).
Sipping this brew can help ease both. The anti-inflammatory herbs turmeric and ginger offer a tangy, slightly sweet flavor that will hit the spot. Lemon balm has been found to have antimicrobial,
antioxidant, and anti-anxiety properties.

Ingredients Needed…

raw honey lemon

– Peel and juice of 1 lemon
1 2-inch piece fresh ginger, peeled and grated or chopped
– 1/4 tsp ground turmeric or fresh root peeled and grated/chopped
– 1 tbsp of dried or fresh rose hips.
Hint: Picking wild rose hips after the first frost turns them soft and pre-ferments them with wild yeast.
– 2 tsp RAW honey or to taste
– 2 drops food-grade lemon-balm extract (also called Melissa) or fresh herbal leaf
– 1 sprig rosemary and/or thyme, optional

This is a small batch mix so increase the ratios if a larger batch is desired.

lemon raw honey

Directions…
– Start by fermenting the peeled ginger root, turmeric, rose hips, and RAW honey.
– Allow this to set and ferment for 3 to 4 days until bubbles are forming on top of the solution.
– Once fermented add the lemon juice/peel and lemon-balm extract. If there is not an extract available, one can be made by making a lemon-balm tea decoction.
– Once all ingredients combined cover and place into refrigerator for use during the winter months.

Use by the spoonful or add to a hot green tea for relief from colds during the winter months.

Enjoy these great wintertime  tonics to combat the cold and flu season.  See more ideas and post on our main Blog page.

For culturing starters, like kefir, koji spores, or Kombucha and fermentation supplies visit our Organic-Cultures online store.

Live, Grow, and Share Cultured Foods…Happy culturing!

Stuffed Cucumber Kimchi – Recipe #3 Oi Sobagi (Traditional)

Kim-chi Oi Sobagi
Oi Sobagi – Stuffed Cucumber Kimchi
(Traditional)
Fermented – Raw – Vegan

  This is a nice and easy to make quick kimchi. Classic for the summertime and are served stuffed to compliment a main dish; they are not quite a condiment and not quite a snack.
The contrasting colours make it great to brighten any dish – the vibrant green of the cucumbers and the red of the chili peppers. This is a great kim-chi for children to try for the first time if not use to foods like kim-chi!
Ingredients Needed:

Brine…

– 2 pounds of cucumbers, unpeeled but with the ends trimmed English cucumbers
– 2 tbsp of sea salt
Filling…
– ¼ cup Korean chili pepper flakes (adjust to your liking)
– 6 ounces Korean chives, finely chopped or 8 green onions, green and white parts, finely chopped.
– ½ cup shredded carrots, optional
– 1 tsp sugar

Directions:

Cut the cucumbers in half width-wise and make a deep X shaped incision extending 2/3’s of the way down the inside of each cucumber.

  Place the cucumbers in a sieve set over a bowl, sprinkle the inside with the salt and allow to set for 30 minutes to drain. Stuff the chili flakes mixture into the cucumbers.  Make sure to place the mixture into all the crevices.  Do two passes: the first focusing on the horizontal segments and the second on the vertical.

kim-chi oi sobagi
Quick Cucumber Kim-chi

Place the cucumbers in a 2 quart-size containers and spoon the remaining filling on top.  Pour the reserved brine liquid into the containers, cover, and set aside at room temperature for 1 or 2 days.  After recommended time, taste the crunchiness and balance of flavors. It should be salty, sweet, and savory.
Serve the cucumbers when the crunchiness that you like. Keep any leftovers in the fridge. This is a quick ferment and keeps about 3 to 7 days. You can keep the reserve kimchi pickle juice to serve over rice noodles or use as a cold soup.

Enjoy!

For all your fermentation needs and culture starters see our web store – store.organic-cultures.com

Instant Apple, Pear, and Persimmon Kimchi (Traditional Winter Type)

pear kim-chi~ Sagyua, Gaam, Bae Kimchi ~ Instant Apple, Pear, and Persimmon Kimchi (Traditional Winter Type)

A trio of fresh seasonal fruits plays the roll of combining the sweet, savory, and spicy by using a combination of sweet autumnal fruits. Feel free to use what is regional to your area. Choose young, firm fruits and crisp, juicy pears are needed to impart bright flavors! Today, we will also build traditional flavors in the Korean style of using different commonly unused parts to complement the fruity-spices nicely. This kimchi may be use like an Indian chutney…great for meat style entrees. Fermentation: Ready to eat or allow to ferment a couple days. This is a quick ferment.

Asian Pear Kimchi
Ingredients Needed:
– 1 lb persimmons, peeled, cored, quartered, then cut into 1/8 inch thick slices
– ½ Asian or Bosc pear, again peeled, cored, quartered, and cut into 1/8 inch slices
– 1 medium apple, peeled, cored, and sliced.
– 12 stems flat-leaf parsley, cut into 1 ½ inch pieces.
– 1 tsp Korean chili pepper flakes
– ½ tsp chopped garlic ½ tsp anchovy sauce

Directions:
– In a small mixing bowl, combine the fruits and parsley steams.
– Add chili flakes, garlic, and anchovy sauce.
– Mix well until combined.
– Let stand for at least 15 minutes for flavors to combine.
– Serve immediately or refrigerate, covered and consume within a few days.

– End
Happy culturing! Live, grow, and share cultured foods.  See our online store for culturing/fermentation items, new culture starters, and more.

Kim Chi Recipe #1 – Mother In-law’s Kim Chi – Baechu Gutjori (Traditional)

kim chiMother In-law’s Kim-Chi Baechu Gutjori (Traditional)

Koreans celebrate the first fall Napa cabbage harvest with this style of Kim-chi.  It may be eaten right away or aged for a time. This style is enriched with both the land and sea with a base of beef stock and sea foods of oysters, salted shrimp, and anchovy sauce.
Ingredients Needed:
Brine…
– To medium heads of fresh Napa cabbage, about 4 to 5 pounds
– 2 tablespoons of sea salt
Sweet Rice Porridge…
To make the porridge add 1/3 cup powered sweet rice to enough water to form a thick paste.  Simmer this ‘porridge’ over heat to remove the raw flour taste.  Allow to cool before adding to the seasoning paste.
Seasoning Paste…
– 2 tbsp of salted shrimp
– 1/3 cup of sweet rice porridge
– ¼ cup anchovy sauce
– ¼ cup beef or vegetable stock
– 2 tbsp minced garlic
– 1 tbsp peeled and grated fresh ginger root
– 2 tsp sugar
– 2/3 cup Korean chili pepper flakes
– ½ cup thinly sliced yellow onion
– 4 green onions, green parts, about ½ cup
– 3 oz of chives
– 6 to 8 fresh oysters (optional)kim-chiDirections:

– Cut cabbage into quarters and then cut ¼ in half lengthwise. Remove cores. End by cutting pieces into 1 inches wide strips and 6 inches long.
– In a large bowl toss cabbage with the salt. Sit aside and allow to brine for at least an hour. Rinse off the salt by running under cold water and allow the cabbage to drain thoroughly.
– To make the seasoning paste… Grind the shrimp and mix in a bowl with the porridge, anchovy paste, stock, garlic, ginger, and sugar. Lastly add the ¼ cup of the chili pepper flakes. Blend well.
– In a large bowl, toss the cabbage, onion, green onions, and chives with the remaining chili flakes. Insure that all the cabbage is coated with the chilies. Add the seasoning paste and oysters and mix well.
– Pack tightly into a 2 quart container, cover, and set aside for 2 to 3 days at room temperature.
Then move to the refrigerator to slow/stop the fermentation. Since the ferment will expand make sure to allow at least a 5% head space to prevent overflow.This style of kim-chi may be eaten directly, allowed to ferment for a short time, or allowed to ferment for a longer amount of times. Enjoy and happy fermenting!

See our web store for many new products, culturing supplies, koji spores, and more:

Moroccan-Style Preserved Lemons

preserved lemons
Moroccan preserved lemons

These days one can buy preserved lemons, however, making them at home brings a rich, clean taste of homemade goodness.  Preserved lemons bring a multidimensional freshness and a wonderfully distinct pungency to the lemons.  Traditional served in Morocco in salads, soups, or even cocktails as they are alongside the grilled fish.  When eating them with grilled sardines only the rind is eaten.

The following recipe only has a few ingredients and only takes a bit of time to make.  You’ll be very pleased with the results!

Ingredients…

– 6 lemons, try to use Meyer style lemons if possible.
– 2/3 cup kosher sea salt
– 1 to 1 1/2 cups fresh lemon juice (use  5 to 6 extra lemons)
– 2 tablespoons extra virgin olive oil
– 6-cup jar with a tight-fitting lid

preserved lemon
Directions…

1.  Wash lemons, then drain.  Some boil the lemons for 5 minutes, but this will kill the natural occurring bacteria and wild yeast.
2.  Cut each lemon into 8 wedges, discarding seeds.  Or the lemons may be left whole and the tops and bottoms deeply sliced 4 times.
3.  Toss lemons with kosher salt in a bowl, then pack lemons, along with their salt, tightly into jar.
4.  Add enough lemon juice to cover lemons.  Seal jar and let lemons stand at room temperature, shaking gently once a day, for 5 days.
5. Add oil to jar and refrigerate.  The oil will help to keep unwanted bacteria from turning the lemons bad.

entree with lemonsNote:
Preserved lemons can be chilled, covered in their juices, up to 1 year.
This is really a salt brine with wanted bacteria and wild yeast.
From the sea salt and correct bacteria the lemons will have a very pleasing taste.Enjoy and Happy Culturing!


Tempeh Gyro w/ Tzatziki

Tempeh Gyro
Tempeh Gyros are a great healthy sandwich that everyone will love.  Simple to make if you already have the bread and have the tempeh marinated.

Fermented – Cultured

Ingredients Needed…

4 ounces of homemade tempeh – cut into strips for marinating
2 chopped garlic cloves
1 1/2 teaspoons dried oregano
1 teaspoon onion powder
1 teaspoon salt
1 teaspoon pepper
1/2 tablespoon garlic
1 teaspoon thyme
4 tablespoons olive oil
1/8 teaspoon cinnamon
1 teaspoon rice vinegar or 1 teaspoon other vinegar

Tzatziki…

1/2 cup peeled grated cucumber
1 tablespoon garlic powder
1 chopped garlic clove
1/2 teaspoon salt
1/4 teaspoon dill weed
1/2 teaspoon mustard powder
1 cup homemade plain Greek yogurt
1/2 cup homemade sour cream
1 tablespoon parsley
2 teaspoons onion powder
1 tablespoon olive oil
1 teaspoon rice vinegar or 1 teaspoon other vinegar
1 teaspoon oregano

Other Ingredients…

4 -6 Greek pita breads
olive oil (for cooking)
lettuce and tomato
Tempeh gyroDirections…
1. To make gyro “meat” cut tempeh into thin strips 1/2 – 1.5 cm in thickness works well.
2. Next make tempeh marinade with all ingredients listed under “Gyro Tempeh”.

Marinated Tempeh
Marinating Homemade Tempeh

3. Pour the marinade over the tempeh, make sure all surfaces are covered and place in fridge to marinate for at least 4 hours, preferably overnight.
4. Next, make Tzatziki- combine all ingredients listed under Tzatziki. Stir well and also place in fridge to sit for at least 4 hours, preferably overnight.
5. When you are ready to eat, set the Tzatziki out to warm slightly while you cook the tempeh.
6. Heat a large skillet with 3-4 tbsp olive oil and heat over medium, once heated place tempeh strips in and let them cook until each side is golden brown.
7. Remove tempeh from pan, and one at a time heat the pitas over medium heat until warmed on each side.
8. Then layer your gyro (pita, tzatziki and tempeh) then top with lettuce and tomato.

Enjoy and Happy Culturing!

“Aguas Frescas” or Fruit Waters – Fermented & Cultured Summertime Drinks

  The hot summer months are one of the best times to ‘drink your cultures’!  With the warm days and abundance of fresh seasonal fruits the wild and cultured yeasts are in their element.  Many traditions throughout the world have fermented drinks some more alcoholic than others.  Most are very easy to make by the addition of fruits and sugar.
Tepache Vendor  Today the focus will be fruit waters or ‘fresh waters’, otherwise known as aguas frescas in Mexico.

For the following recipes the basics are all the same.  To produce a beverage, a starter culture strain, such as water kefir grains, will be needed or the available wild yeast may be used.

Tepache de Pina: Mexican Homemade Pineapple Brew

Fermented/Cultured – Vegan – RAW

Tepache de Pina
A classic aguas frescas commonly sold by street vendors throughout Mexico.  The drinks are prepared with a combination of sugar, grains, and cut or pulped fruits.  The flavors range from Tepache, Papaya, Watermelon, Cantaloupe, Lemon, horchata (hibiscus flower), fruits like oranges, banana, mango, and even jamaica or cucumbers.

Ingredients Needed…
Tepache ingredients

  • 1 Pineapple – Ripe or canned, diced or pulped.
    Hint: Save some of the pineapple for a garnish when serving
  • 1 cup or large cone of Piloncillo, cut in pieces, or use an organic sugar/molasses combination, or dark brown sugar.
  • 2 quarts of filtered water
    Optional:
  • 1 stick of cinnamon
  • 3 cloves

Directions…

Easy for wild fermentation.   Combine all ingredients into a large pitcher or ceramic pot.   Cover with plastic wrap or several layers of cheese cloth.   Allow to set for 12 to 24 hours.   Remove any white foam that may have formed.   Cover again and allow the Tepache to set for 12 to 20 more hours, or until taste is correct.   Adjust the sugar level if needed.   Dilute the finished beverage with water, if the taste is to strong/sweet.   Strain and Chill.
Serve by the glass garnished with a slice of pineapple.

If using water kefir to culture the beverage, combine the water, fruit, and sugar allowing it to set for 12 to 20 hrs.  Remove the kefir grains from the mix and add in the optional ingredients if desired.  Allow beverage to set another 12 to 20 hours, until taste is to one’s liking.  Finish as above.

Notes:  DO NOT let it ferment longer unless you need pineapple vinegar which is used to flavor other condiments pickled chipotle peppers.

Mexican Strawberry Water (Aguas de Frescas)

Fermented/Cultured – Vegan – RAW

Tepache strawberry
Tepache Strawberry – Aguas Frescas

Another simple Tepache, this one made with strawberries, mint leaves, and lime.  A very refreshing summertime beverage, this frescas brings the cooling properties of mint and the tartness of lime.

Ingredients Needed…

  • 4 cups strawberries, quartered
  • 1 cup cane sugar or any sugar
  • 8 cup cold water or cultured water kefir
  • 1 lime, cut into 8 wedges (optional)
  • Mint leaves, fresh (optional)

Directions…

Mix strawberries, sugar, and 2 cups water in a bowl.   Cover and allow it to set for 4 hours.   This will help to remove the juice from the berries.
Tepache beverage
Take the strawberry mixture and pour into a blender.   Add some of the fresh mint and lime, if desired.   Blend on high until smooth.   Pour the blended berry mixture through a wire mesh strainer set over a large mixing bowl; discard the pulp and seeds if desired.

Add the remaining 7 cups cold water to the pureed strawberries and mix well. Place the Aqua de Frescas in the refrigerator to chill for several hours or pour over ice and serve immediately.
Garnish with lime slices and/or mint leaves.

If using water kefir in this recipe the strawberries may be added when making the kefir.  Then the whole amount is blended after removal of the water kefir grains.  Fresh berries may be added when blending if the sugar content has dropped to low.

  Tepache is an easy homemade beverage that can vary in taste and what fruits are local and in season.  Try making different combinations of fruits like watermelon or blackberries, a batch with wild yeast fermentation, or with a stable culture strain like water kefir.
Water Kefir Grains  
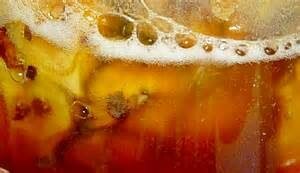
If water kefir grains are needed we have 5 different strains at our store –
store.organic-cultures.com

Enjoy.  Happy Culturing!

How to Make Natto…Natto Kin Spores

natto kin


What is Natto?
Nattō (なっとう or 納豆?) is a traditional Japanese food made from soybeans fermented with Bacillus subtilis var. natto. Some eat it as a breakfast food. Nattō may be an acquired taste because of its powerful smell, strong flavor, and slimy texture. In Japan, nattō is most popular in the eastern regions, including Kantō, Tōhoku, and Hokkaido.

Before Making NATTO:

  • Be sure the entire processing area is cleaned for production. Make sure all utensils, pots, cheesecloth (FUKIN), etc. are as sterile as possible. (Boil utensils for 5 minutes prior to using.)
  • The packet of NATTO spores comes with a special small spoon; be sure to use the small spoon to measure the appropriate quantity for the recipe.
  • The fermentation process requires the NATTO be kept at approximately 100°F (37°C) degrees for 24 hours. Ovens with a low temperature setting can be used, an oven w/ light on only, or inoculate in large cube-shaped food dehydrators.
  • NATTO is quite odorous while fermenting, and you may want to isolate the fermenting NATTO during this time.

Ingredients and Supplies needed for Making NATTO:

  • 2 pounds (900g) soybeans (about 4 cups)
  • 10cc water, boiled for 5 to 10 minutes to sterilize
  • One spoonful (0.1 g.) NATTO-kin spores (use the special spoon that came with the packet)
  • Cheesecloth or butter muslin (FUKIN in Japanese)
  • Non-reactive pot (i.e., stainless steel, enameled, ceramics, etc.) or Pressure cooker
  • Large stainless steel, wood, or plastic spoon or spatula
  • 3-4 oven-proof glass containers with lids

Instructions for Making NATTO:

– Wash the soybeans using running water to gets rid of tiny dirt or dead skins off the beans.

Washing soy bean
Washing the Soaked Soy Beans

– Soak with clean water for 9 to 12 hours (longer soaking time recommended during colder months). Be sure to use approximately 3 parts water and 1 part soybeans to allow for expansion. You will end up with 8 to 12 cups of beans.

drained soy beans
Draining Soy Bean for Steaming/Boiling

Drain the beans from the soaking water. Place beans in a large pot with mesh bowl and pour in water. Steam it for 3-4 hours. Or fill with water and boil 5-6 hours. The recommended way is to use a “Pressure cooker”, that can be cooked faster than in a normal pot. Please refer to the pressure cooker instruction manual for operation guidelines.

cooked soy beans
Steaming Soy Beans for Natto-Kin

– Drain the cooked beans and place in a sterilized pot.  Dissolve 1/5 special spoonful of NATTO spores (0.1g) into 10cc of sterilized water (or mix by package directions).

natto spores bulk

japan natto
Types of Natto Spores From Japan

– Immediately pour the NATTO spore solution over the beans while the beans are still warm but not hot to the touch. Stir the beans and water mixture together carefully using a sterilized spoon/spatula.

inoculation of spores
Inoculation With Natto Spores

– Place a thin layer of beans in each of the 3 to 4 containers. If at any point during the process some beans are spilled on the counter, etc., discard the spilled beans as they can contaminate the other beans if added back in to the batch.

package inoculated beans
Natto Being Packed into Serving Trays

Place the sterilized cheese cloth over the top of the containers and place the tight-fitting lid over the cheese cloth. Preheat the oven, dehydrator, or KOTATSU Japanese Warmer to 100°F (37°C). Place the covered containers in the oven, dehydrator, or warmer and allow the NATTO to ferment for 24 hours being sure to keep the temperature steady at 100°F (37°C). Check the temperature throughout the day/night.

inoculation
Inoculation Time !
At the conclusion of the fermentation period, let the NATTO cool for a couple of hours, then remove the lid and the cloth, replace the lid, and store the containers in the refrigerator at least overnight.

NATTO can also be aged in the refrigerator for 3-4 days. Smaller portions of finished NATTO can be stored in the freezer and thawed for later use.

natto dish
Ready to Eat…YUM!

Need Natto spores fresh from Japan?  We have them in our store with many other types of food culturing spores:

Japanese Natto Spores
More Food Spores

Happy Culturing!